Up to now you have been reflecting on and collating what you have produced in this unit. Now take the 10 images you uploaded in the last exercise and print them off – you could print off several versions at different sizes to give you lots of visual options. For this exercise you are going to mix up and combine selected elements to create new images. If you are comfortable with software you may decide to complete this exercise digitally.
Lay out your printed images somewhere so that you can look at them together. This is similar to the ‘Cut Ups’ exercise in Part Two but this time all of the imagery is of your own making. Arrange your composite drawings to create connections between them. You could choose to group elements from different drawings together to see what happens, or elements from a few of your photographs. Or you could mix up part of a drawing with part of a photograph and part of a painting. You might like a figure in one image and a landscape in another – put them together to see what new story or narrative they create. Be as experimental as you can. When you have made 10 new composite images upload them to your blog and reflect on the process in writing on your learning log.
Visual Skills 2: Visual Exploration p129
Keywords from the brief
Take the 10 images you uploaded in the last exercise and print them off
Mix up and combine selected elements to create new images.
You may decide to complete this exercise digitally.
Arrange your composite drawings to create connections between them.
Be as experimental as you can.
Reflect on the process in writing on your learning log.
Here is a link to my last exercise that contains the ten selected images.
To see all the images I had chosen up front, I first made an online mood board of them. I then started experimenting with different compositions and digitally segmenting certain areas of each image. Here are the finished drawings made from different portions of the earlier pictures.
One
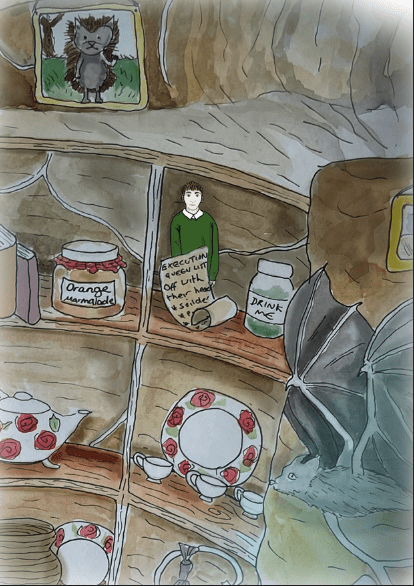
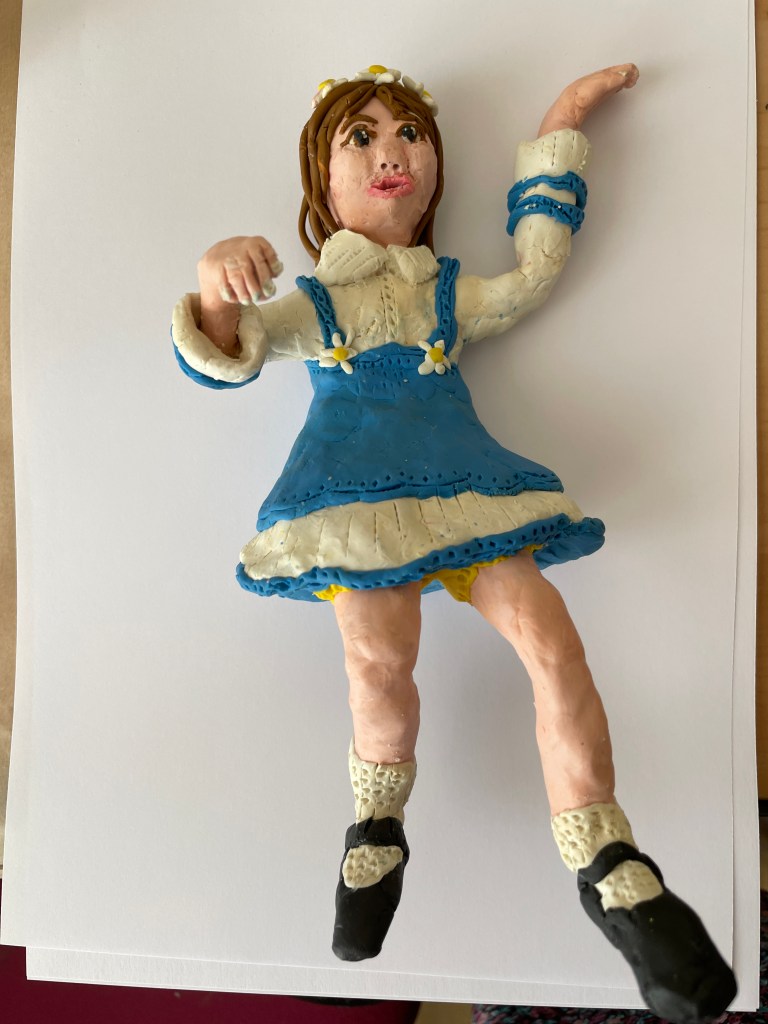
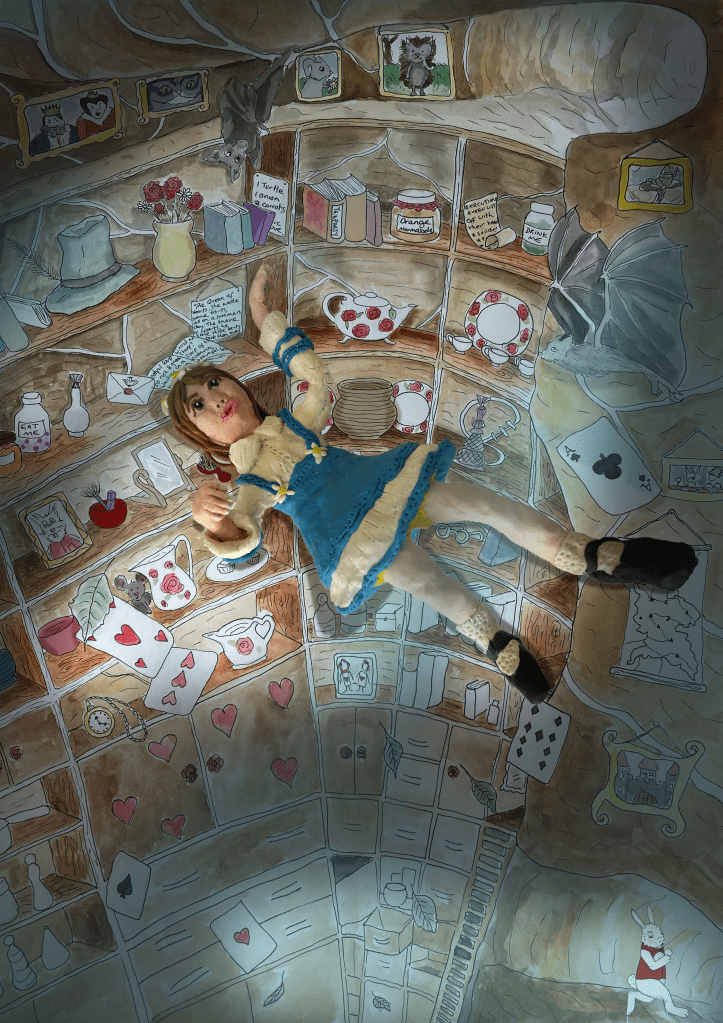
For the first image, I combined a character I drew for the exercise Slow and a background I painted for Assignment 4. It excited me, as I could see possibilities for a new story. To show my idea, I then wrote a paragraph for the story and made a mockup.
Fig. 1 schoolboy down the rabbit hole (2024)
Fig. 2 schoolboy down the rabbit holemockup (2024)
Two
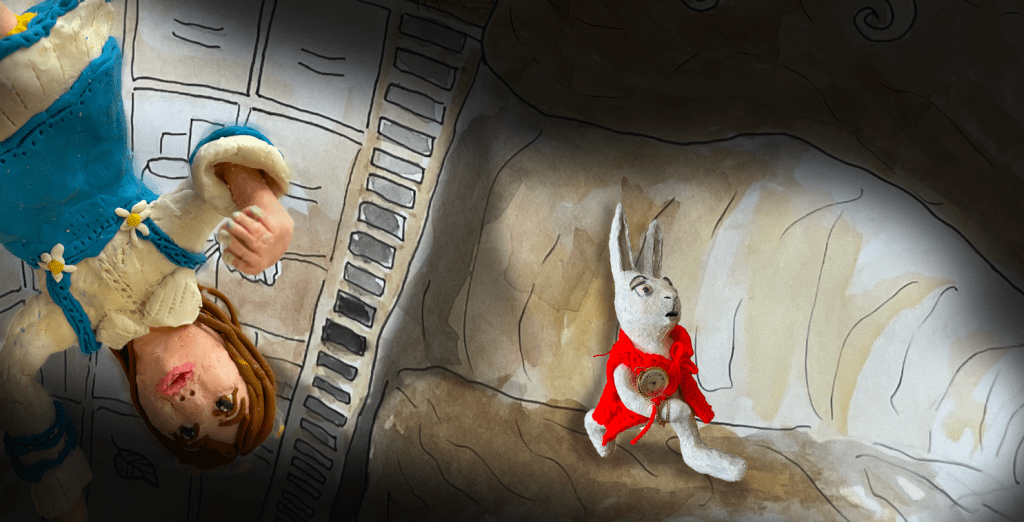
For the next illustration, I experimented with a different composition. I did this by combining the background from assignment four with the two clay sculptures. It was interesting to focus on the fleeing rabbit instead of the earlier detailed drawing.
Fig. 3 Fleeting Rabbit (2024)
Three
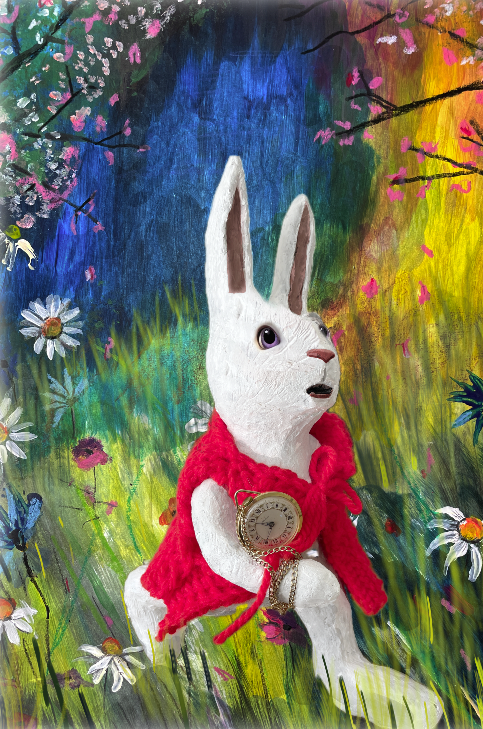
For this illustration, I combined the drawing of a house from the Slow exercise, where I created a comic, with the background and white rabbit drawing from Assignment 4.
Fig. 4 Rabbit going home (2024)
Four
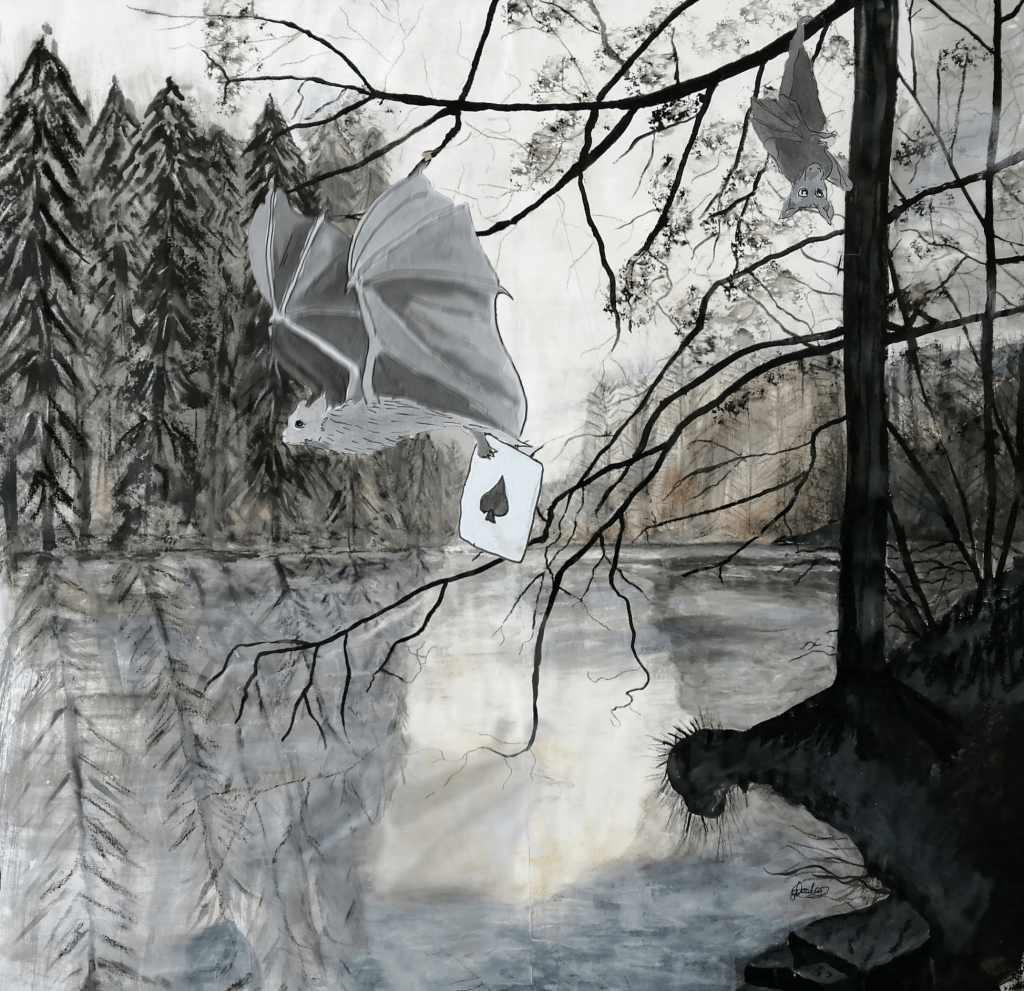
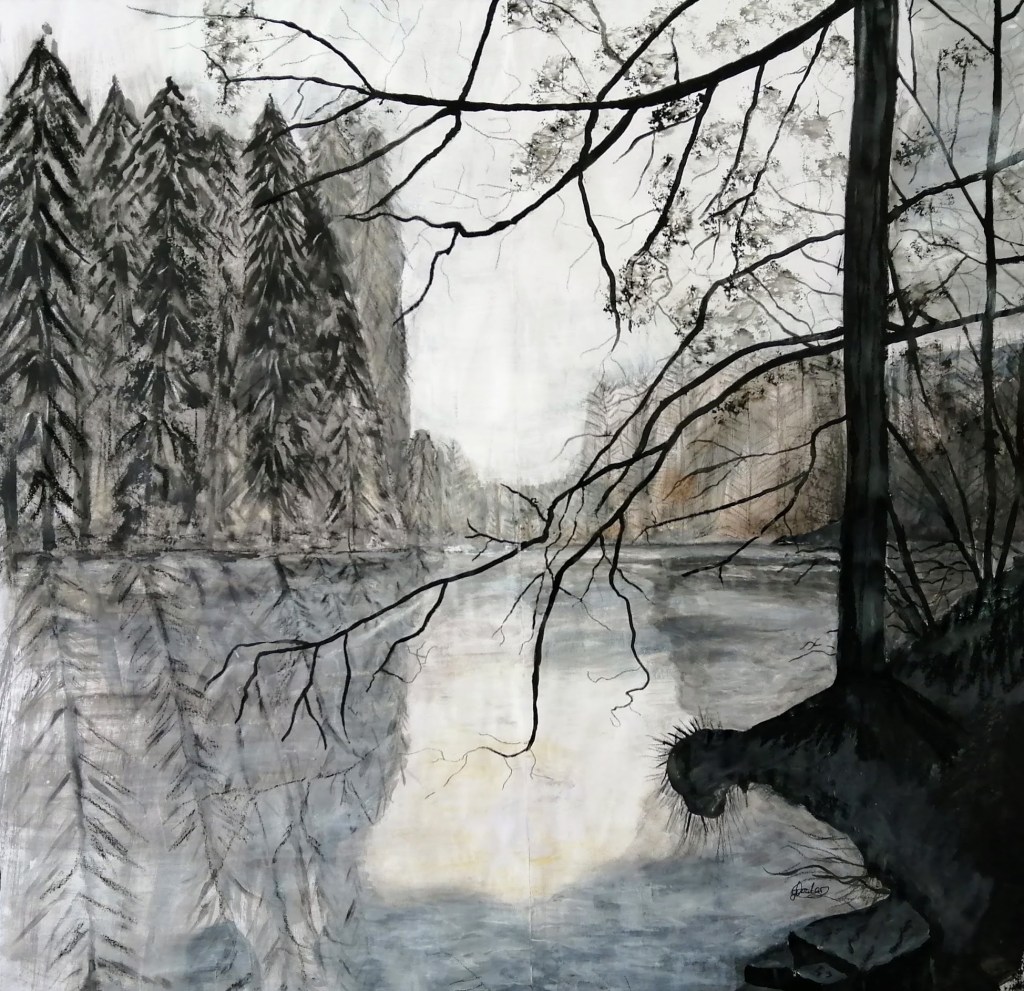
This drawing incorporates elements from assignment 4’s background with the painting I completed for an exercise in part three.
Fig. 5 Bats (2024)
Five
This drawing incorporates elements from assignment 4’s background with a character I drew for the exercise: Slow. I then added the text ontop of the painted shape.
Fig. 6 Take time to make your soul happy (2024)
Six
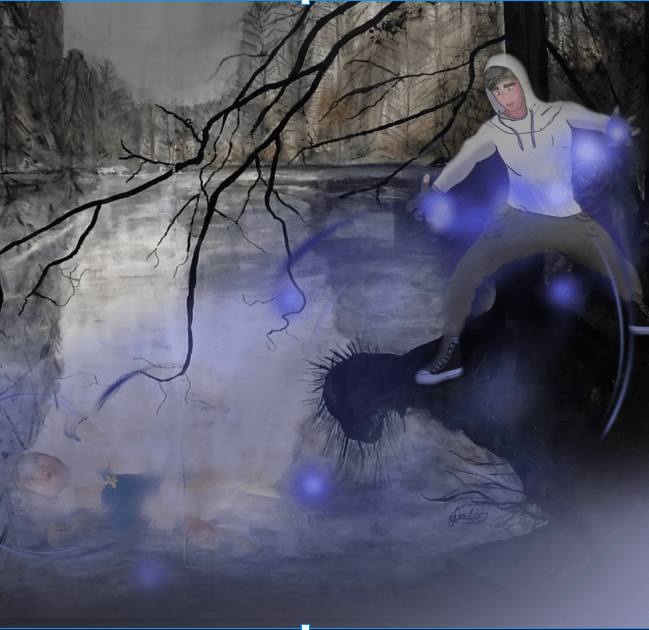
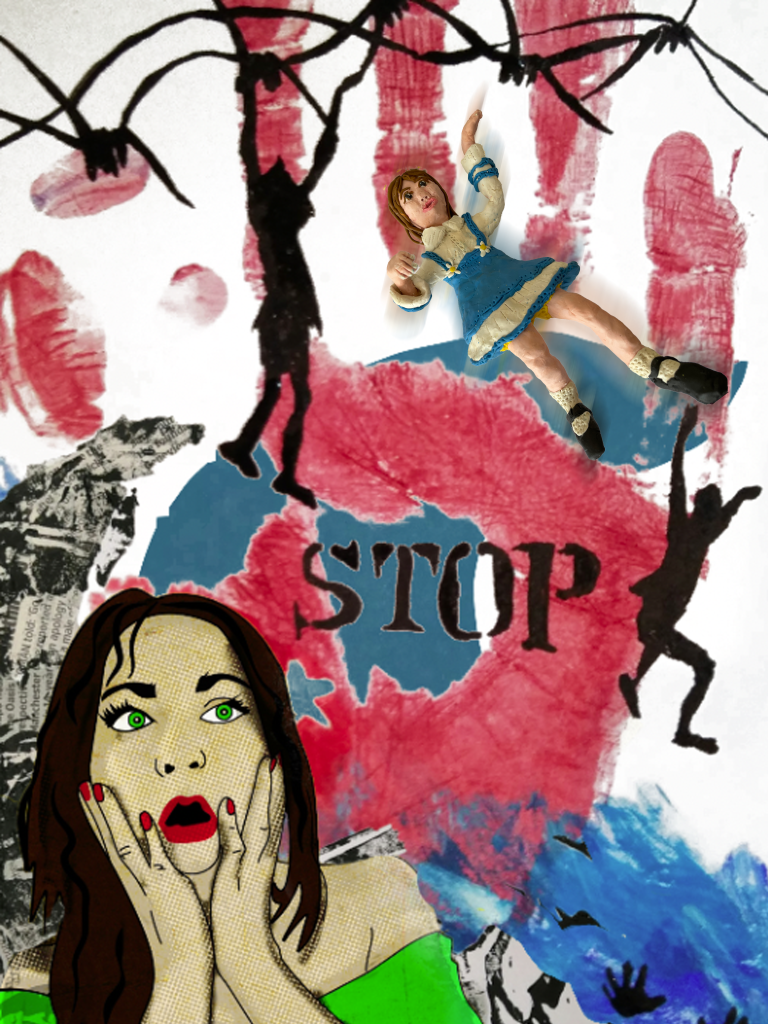
This drawing incorporates elements from part two and part four. The alice clay sculpture can be faintly seen in the water.
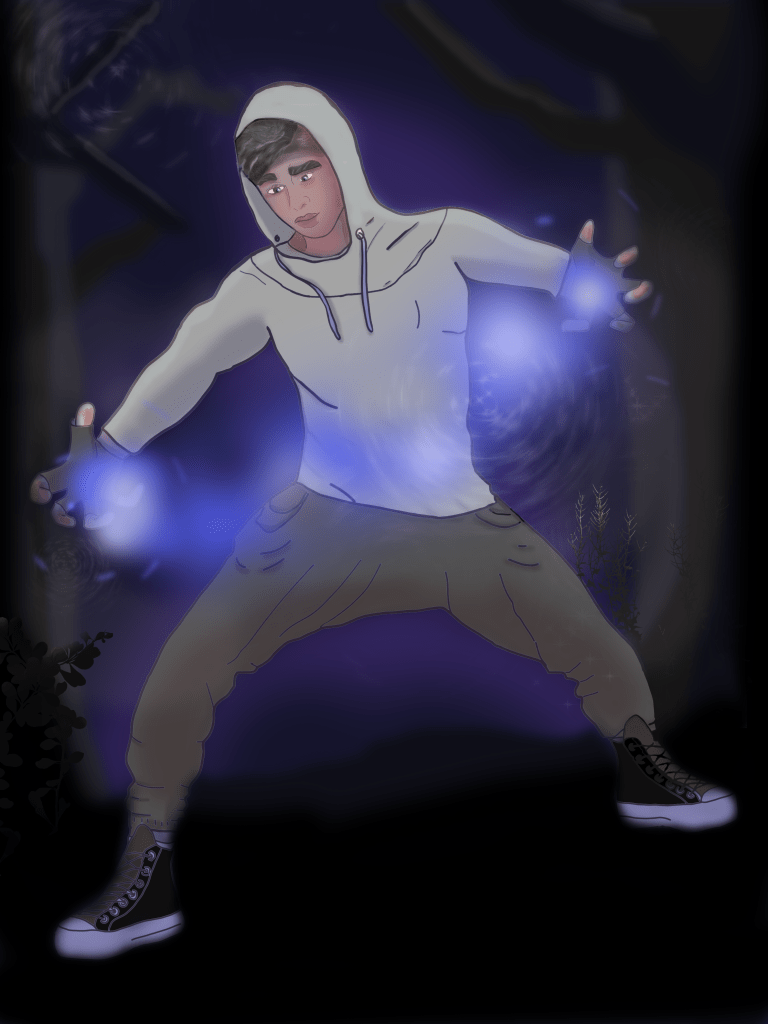
Fig. 7 Wizard saving Alice (2024)
Seven
This drawing incorporates elements from part two and and assignment four.
Fig. 8 Wizard capturing the rabbit (2024)
Eight
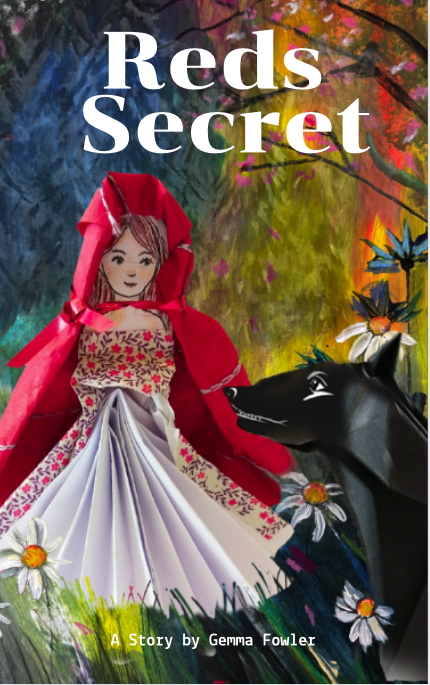
This drawing incorporates elements from part three and four.
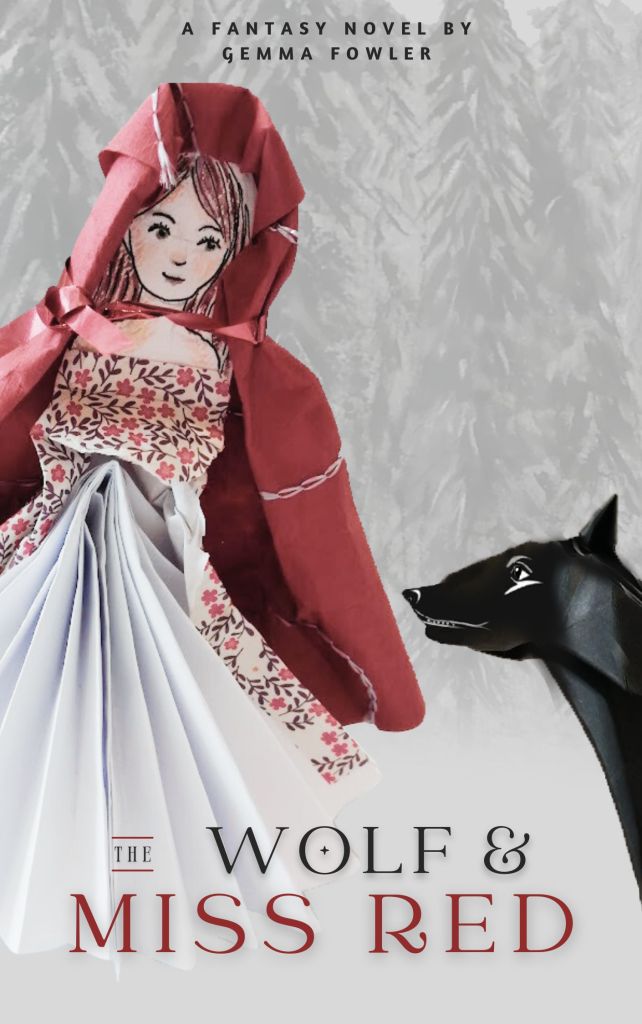
Fig. 9 Reds Secret (2024)
Nine
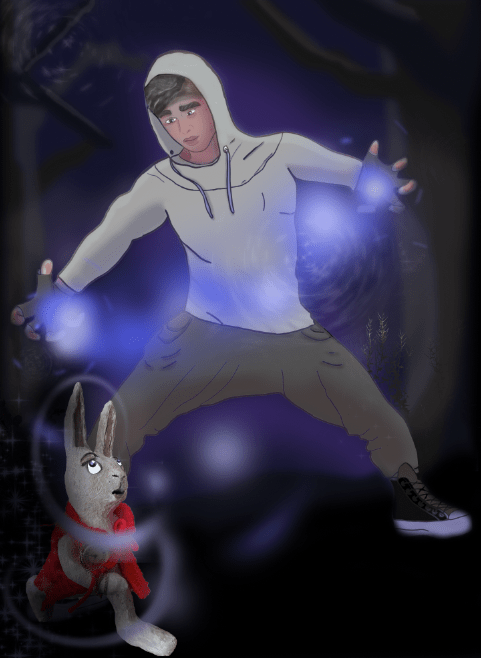
This image incoperates ellements from each part of the unit. It reminded me of some of the dreams I have had in the past.
Fig. 10 Am I dreaming (2024)
Ten
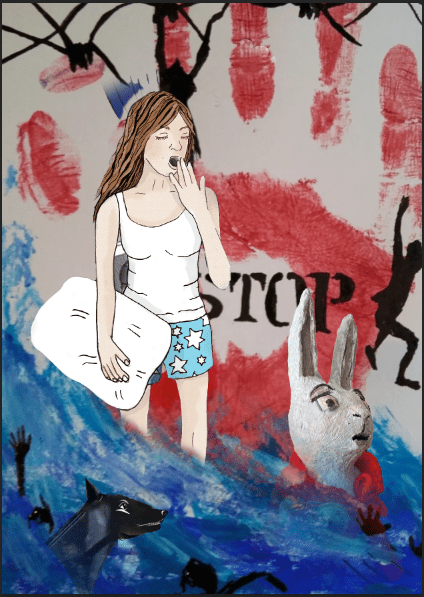
This illustration incoperates elements from part two and four.
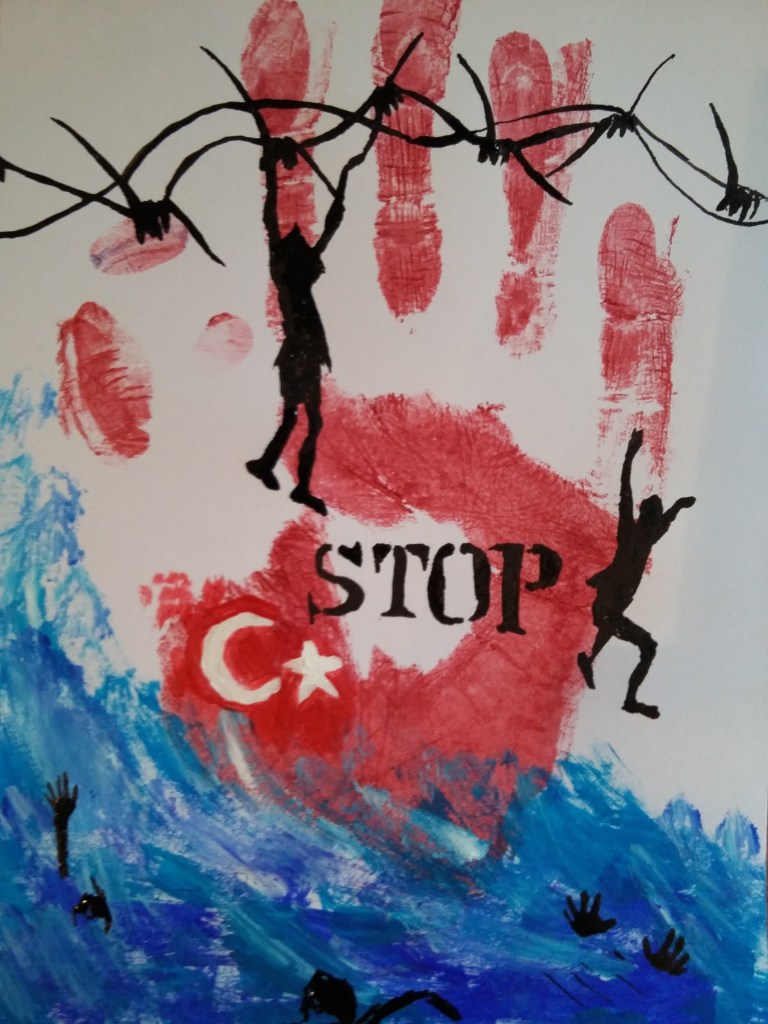
Fig. 11 Stop (2024)
Reflection
The process of combining different elements from various past images has allowed me to explore new perspectives and create unique visual narratives. By digitally segmenting certain areas, I was able to play with composition and create unexpected connections between the original artworks. Overall, this exercise has pushed me to think outside the box and experiment with my creativity in a new way. The final images show a blend of colours, textures, and shapes that were not originally present in the individual images. From all of the new illustrations my favourites are number one, seven and eight as I think they could be used in childrens books.
List of illustrations
Fig. 1 Fowler, G (2024) schoolboy down the rabbit hole [mixed media] In possession of the author: Forest of Dean, UK.
Fig. 2 Fowler, G (2024) schoolboy down the rabbit hole mockup [digital artwork] In possession of the author: Forest of Dean, UK.
Fig. 3 Fowler, G (2024) Fleeting Rabbit [mixed media] In possession of the author: Forest of Dean, UK.
Fig. 4 Fowler, G (2024) Rabbit going home [mixed media] In possession of the author: Forest of Dean, UK.
Fig. 5 Fowler, G (2024) Bats [mixed media] In possession of the author: Forest of Dean, UK.
Fig. 6 Fowler, G (2024) Take time to make your soul happy [mixed media] In possession of the author: Forest of Dean, UK.
Fig. 7 Fowler, G (2024) Wizard saving Alice [mixed media] In possession of the author: Forest of Dean, UK.
Fig. 8 Fowler, G (2024) Wizard capturing the rabbit [Digital illustration and clay sculptute] In possession of the author: Forest of Dean, UK.
Fig. 9 Fowler, G (2024) Reds Secret [mixed media] In possession of the author: Forest of Dean, UK.
Fig. 10 Fowler, G (2024) Am I dreaming [collage] In possession of the author: Forest of Dean, UK.
Fig. 11 Fowler, G (2024) Stop [collage] In possession of the author: Forest of Dean, UK.
To think about my final assignment I looked back through all of my artwork created for this unit and identified the works that I think are particually successful.
To do this I reviewed my sketchbooks, as well as the finished pieces and read back over my reflective statements and notes in my learning log for each part of the course and made notes.
Part One – What was involved
In Part One of the course I considered my workplace, working process, concepts and ideas key to visual thinking like flow, and play and how they can be used to develop thinking and making processes.
For one of the tasks, I illustrated my ideal studio, which I liked not just picturing but also creating humour by including my son and pets in the illustration.
For the assignment, I created an A2 playful illustration by making purposeful markings of varying sizes and shapes from one corner of the paper to another with various mediums. Once finished, I chose sections representing distinct feelings and created additional images.
What I learnt during Part One
To not be afraid of making mistakes
That random mark-making can be an effective method for conquering the blank page and generating fresh ideas.
Doodling on a page allowed me to select little portions and create fresh illustrations with emotional significance that I could envision being utilised for various items.
Part Two – What was involved
In part two I developed these concepts and ideas to examine several approaches to generate ideas and visual thinking through controlled, randomised and accidental working methodologies. These included:
An exercise called Composing Pictures. This involved collaging existing works into something new. This included a successful, political collage.
Creating collages from daily tabloids
Creating a word poem by the use of a word processing application and then creating illustrations for each word and eventually combining them all into one coherent image.
Assignment 2 I created a video presentation of my work during the unit.
Playing the word association game by creating mind maps to help generate new ideas. This led to a successful illustration of a Wizard where I tested my technical skills.
Choosing a word and making a list of all the different manifestations that a word can take. Then I made each manifestation into illustrations.
Multi-dimensional thinking strategies.
What I learnt during Part Two
I have explored many concepts and attempted various methods to develop new ideas during this section of the course. I have learned a great deal from this. I am inspired to make illustrations that evoke emotions or convey a message somehow because of them.
It has also taught me not to be afraid to do new things, even if I don’t end up with the greatest piece of art, since it will lead to other opportunities and further my artistic development.
During part two, I created a comfort zone illustration by writing down topics that make me uncomfortable and comfortable and categorising them into different coloured circles. I concluded that I should repeat this exercise to evaluate if my skills and weaknesses had changed. Below is the original.
First, I edited the original, deleting all unrelated topics, and then created a new one focusing solely on my illustration concerns and skills to see if anything changed.
I was pleasantly delighted that several topics have now moved into my comfort zone rather than the danger zone, proving to me that I have grown as an artist over this course and gained more confidence than I thought possible.
Part three
In part three I examined various technical, stylistic and creative processes and explored and experimented with the ideas of duration, scale and movement through creative making. These included:
Paper folding where I learnt skills in Origami and tested my perseverance.
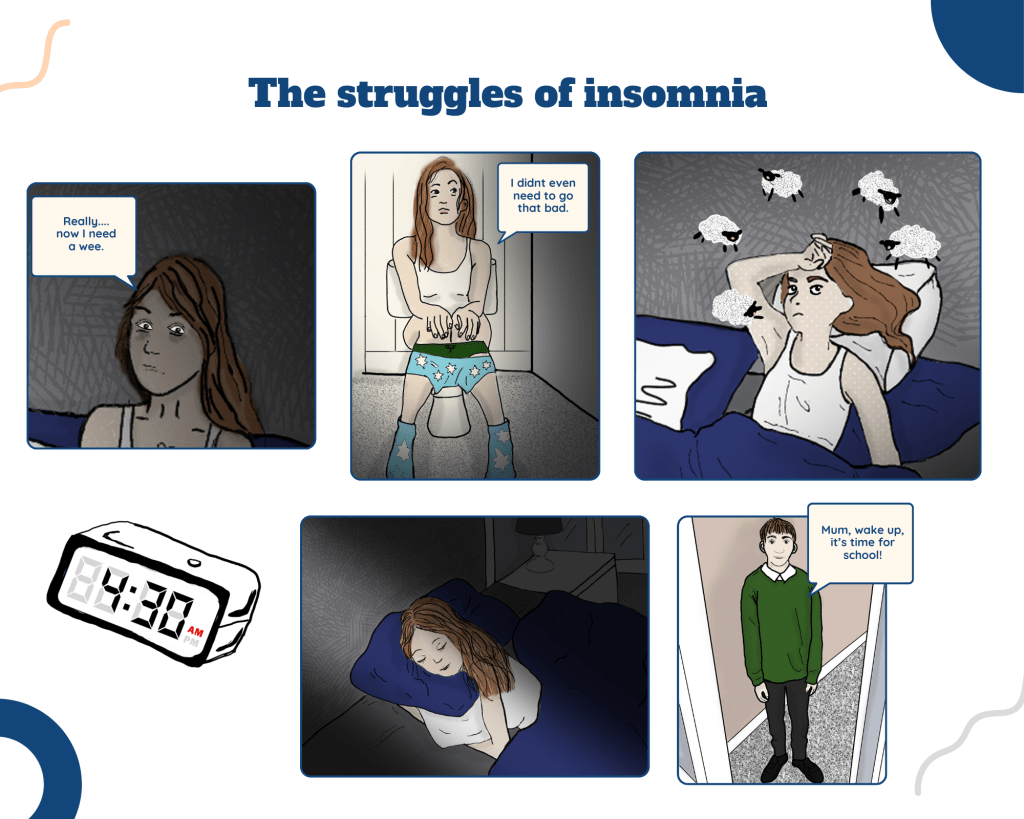
Created a comic based on my own experiences with the struggles of Insomnia.
I created rapid portraits of facial expressions using plasticine and found my love of sculpture again.
Continuous line sketches
Assignment three I created an animation about a ballet dancer struggling with the torments of bullies.
What I learnt during Part Three
To make time to play and have fun experimenting
I have found my love of working with clay again.
I have strengthened my hand and eye coordination by practising continuous line drawing.
Part four
In Part Four I selected one of three possible themes to develop my own visual research, experimentation and creative process culminating in a body of original artwork. Working with the theme ‘ Imagination’ This assignment brought my observational skills, innovative strategies and making methods together to fully develop my ideas and concepts into a coherent body of artwork.
The assignment was based on my interpretation of some of the scenes from Alice in Wonderland
What I learnt during Part Four
The importance of asking for feedback on my work
I enjoy creating work from my imagination
This assignment has proved that I want to become a children’s book illustrator because of how much I have enjoyed it.
I have developed a unique artistic style.
After I selected 10 pieces of work I have made in this unit I think are particularly successful. These are shown below including a link to an animation I made.
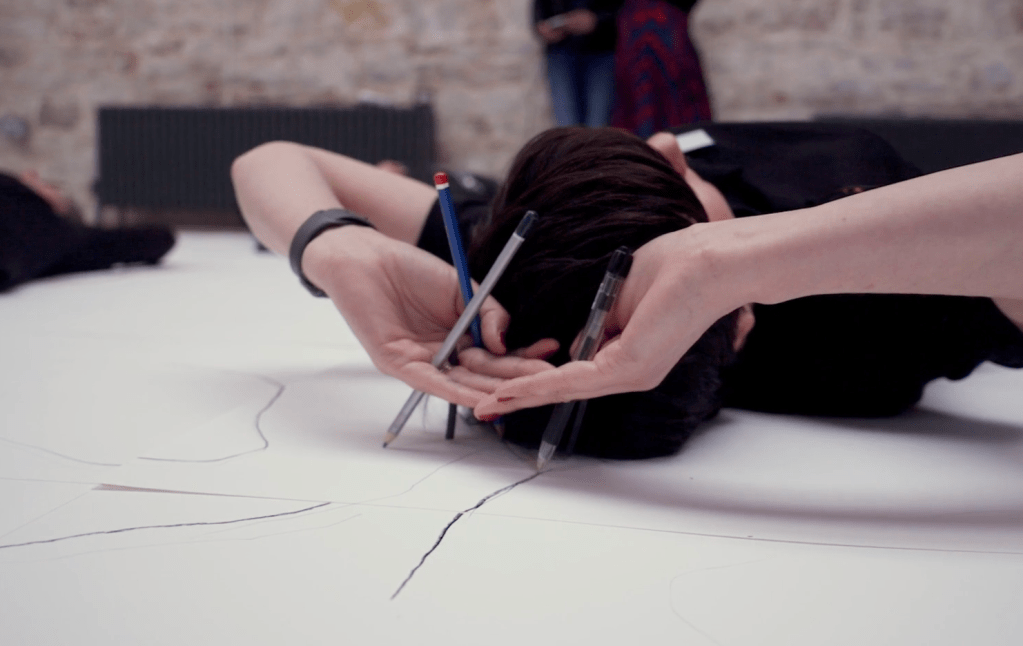
For this research task, I have been asked to look at a one-day conference called ‘The Embodied Experience of Drawing’, held in 2018, in Plymouth. After, I was asked to make some notes about the participants different drawing techniques and physical processes.
To do this, I watched a short video that observed the participants drawing and took screenshots of people’s different approaches.
Here’s a picture of one of the conference women, lying on her back. Taking different pens and pencils and making marks on the page without looking at it. The marks made will be limited by the extension from her elbow upwards.
Approach one
Fig. 1 Drawing approach one extension of elbows (2018).
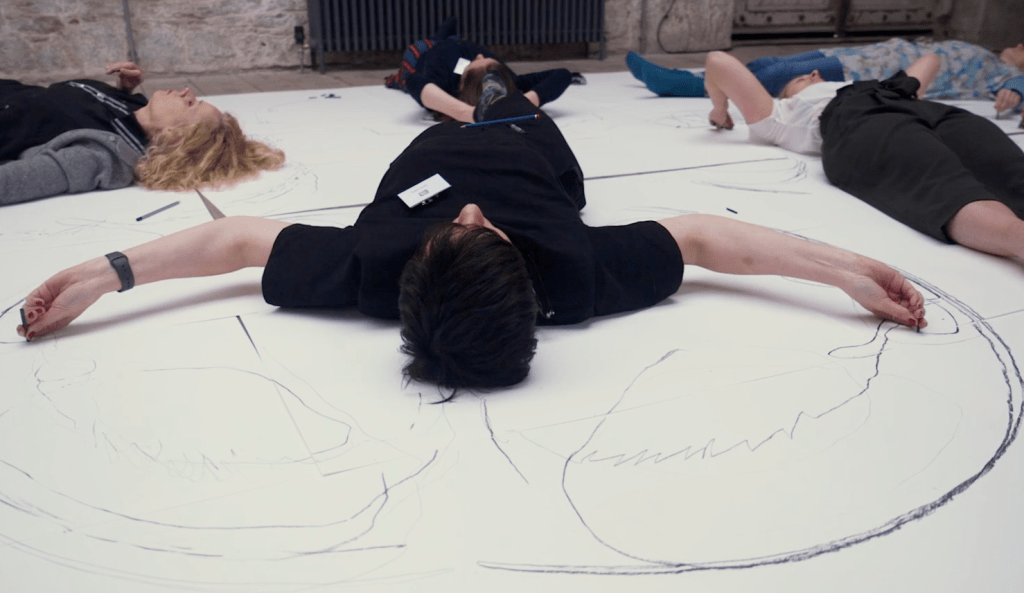
The next image, is the same approach as above but allows a full extension from the shoulders into both arms. This creates a more flowing line work, especially with the medium charcoal as it makes bold expressive lines.
Fig. 2 Drawing approach one, full extension of arms (2018).
Approach two
With the next approach, this lady is sitting looking at the paper on her knees. Again using charcoal but this time using the motion of her arms to swish back and forth in front and behind her.
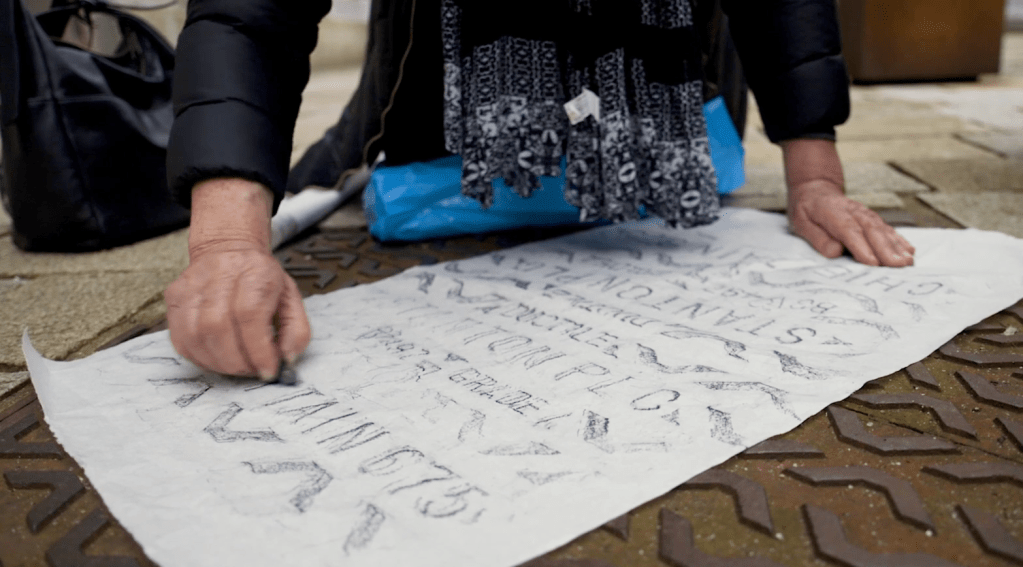
In the next image, the lady is making marks by creating rubbings from various surfaces.
Fig. 4 Drawing approach three, rubbings (2018).
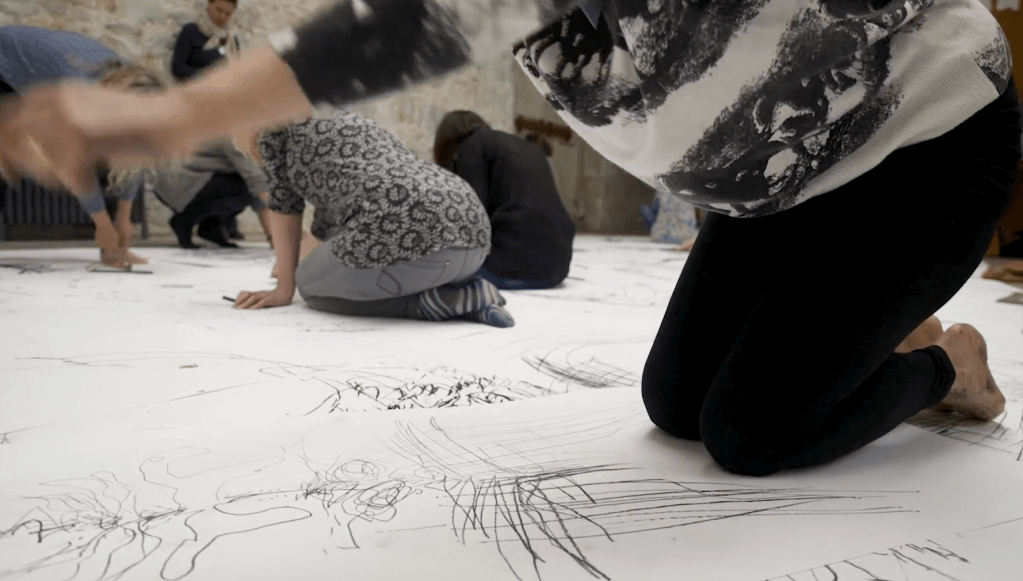
Approach four
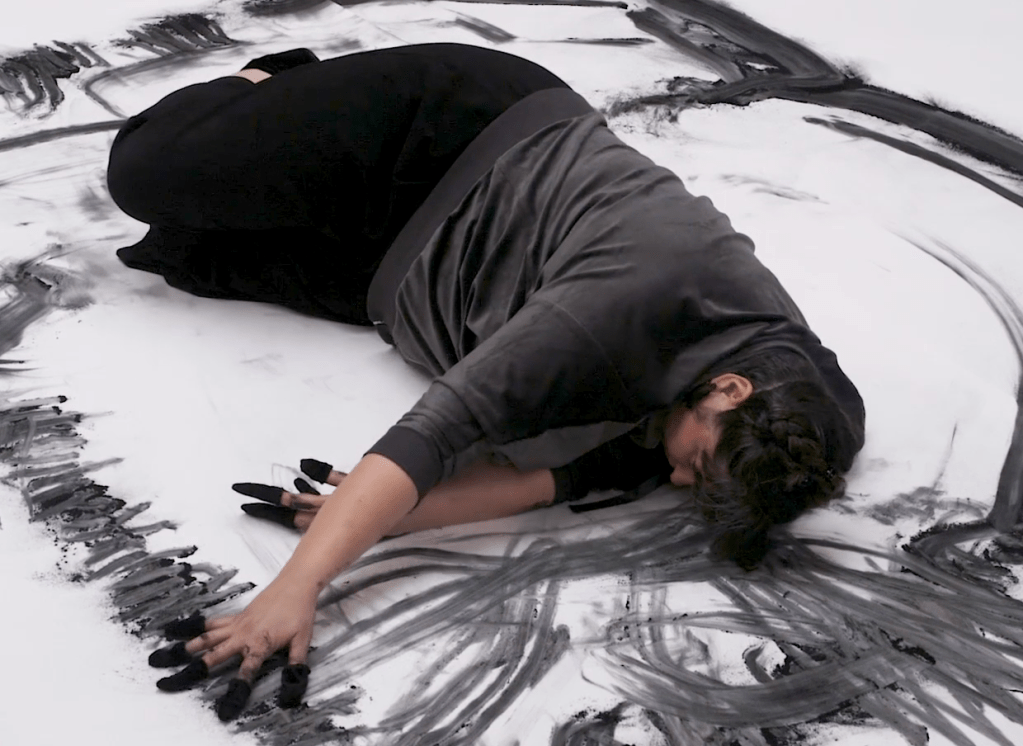
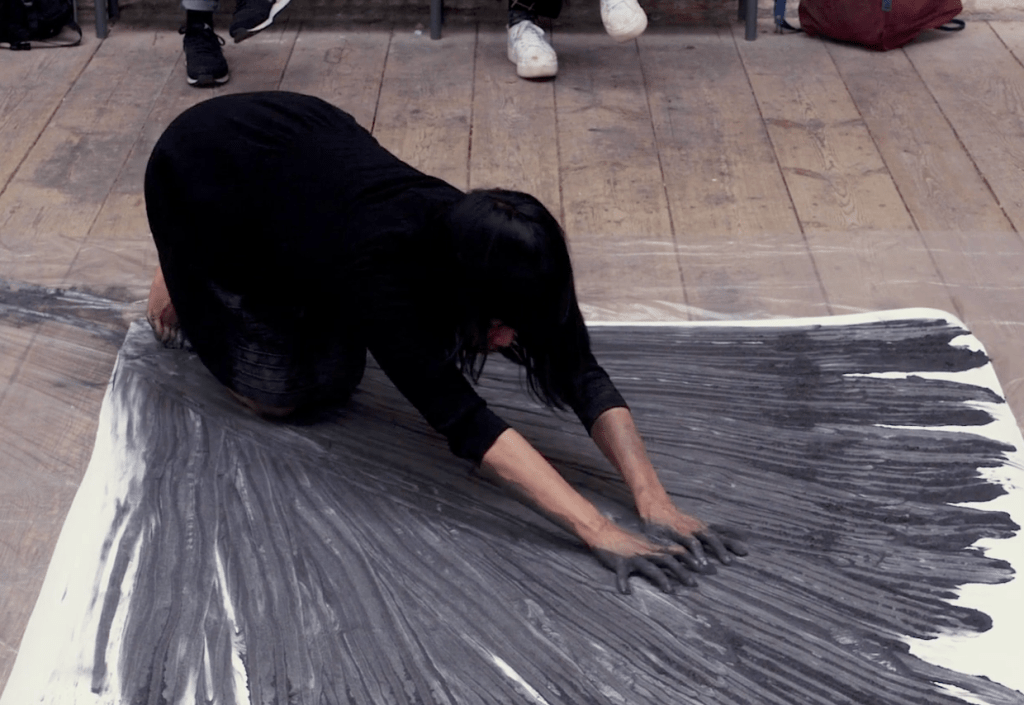
In the next two images, the participants are using their whole bodies to create marks with what I think is graphite powder. This is a more physical approach than the previous ones and will make the most expressive marks.
Fig. 5 Drawing approach four, whole body 1 (2018).Fig. 6 Drawing approach four, whole body 2 (2018).
Approach five
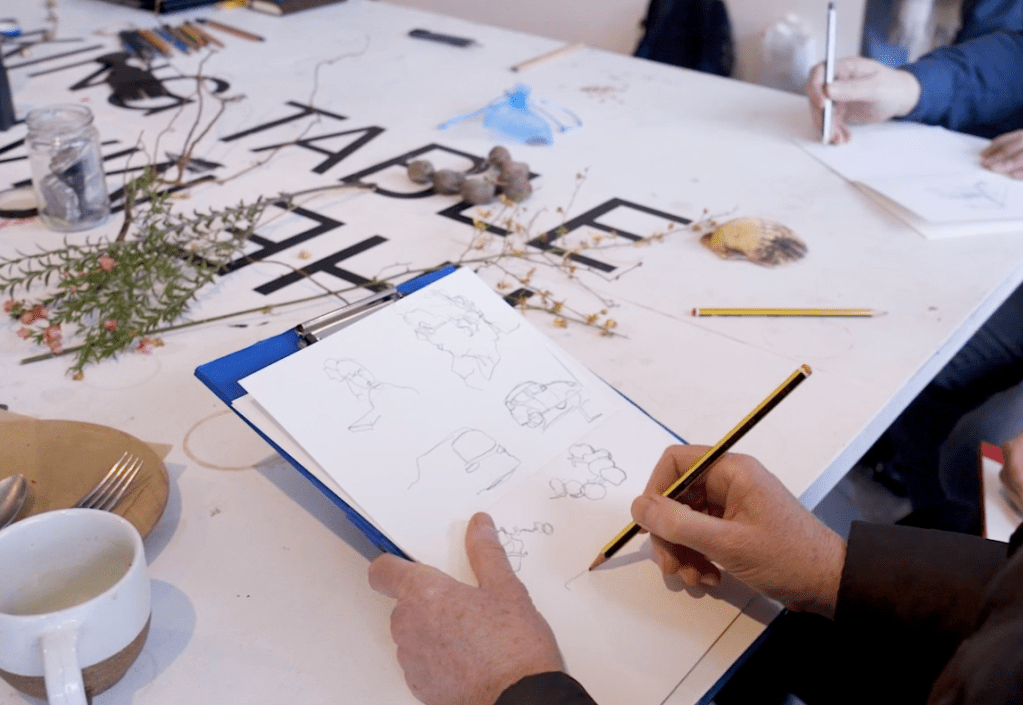
Finally, many artists were practising their observational skills by drawing still lifes.
Fig. 7 Drawing approach five, observation (2018).
From watching the video, I can see the purpose of the day was to explore the relationship between drawing and using various parts of the body or the whole body. It would be a beneficial exercise that will help to explore new ways of approaching drawing.
Next, I was asked to search for and record my thoughts on some of the listed artists in the OCA textbook who make large-scale images.
The following artists from the textbook appealed to me:
Emma Stibbon
John Vertue
The Boyle Family
Emma Stibbon
Before starting the previous exercise, which was to create a large landscape scene, I began first, with this research task. One reason I selected Emma, is because Emma is a British artist known for her large-scale drawings and prints that often depict dramatic landscapes and environmental events. This is therefore an appropriate research task before embarking on the previous exercise and I thought I may find inspiration from Emma’s work.
Stibbon has visited remote and environmentally significant places all over the world, such as Antarctica, the Arctic, Iceland, and volcanic regions. Emma creates reference sketches of these natural landscapes, glaciers, volcanoes and polar regions while on location, which she then refers to when creating her finished pieces in her studio. The drawings and prints serve as visual records of her observations and encounters whilst on her expeditions. As she states on her website,
“Many of the environments and landscapes I depict are changing rapidly. As an artist, I feel committed to representing the impact of these changes, be they natural or human. My impulse is to draw, in an effort to act as a witness.” (Stibbon, n.d.)
Stibbon’s drawings and prints are full of detail and powerful compositions. She often works in monochrome, using charcoal, graphite, ink, and other media to create intricate pictures.
Her creations evoke awe; they make me feel as though I’m there, experiencing the moment she has captured.
John Vertue
John Virtue, is a contemporary British artist, known for his distinctive monochromatic landscape paintings, primarily in black and white. Many of his large-scale works consist of dramatic landscapes, often depicting urban scenes, coastal views, and rural landscapes.
Researching online, I found a very interesting documentary where Virtue discusses the makings of his artworks.
(The Culture Show: John Virtue, 2012)
He explains his work consists of abstract compositions from the way he perceives the world. In order to do this he is very experimental with the materials he choses to use, such as many different types of brushes, rags, his own hand, black ink mixed with shellac and titanium acrylic. (Virtue, J, 2012)
His artworks consist of bold brushwork, strong contrasts, and are full of movement and energy. What I find interesting about his work is there is a powerful sense of atmosphere and mood even without the use of colour.
Below are some examples of his work.
The Boyle family
The Boyle Family is a group of artists consisting of Mark Boyle, Joan Hills, and their children Sebastian Boyle and Georgia Boyle. It began originally with the mother and father in the early 1960s, when they started to visit demolition sites in London and gathered materials to use in their artwork.
To get a better understanding of who the family are and their artistic approaches I watched the following documentary.
(‘Boyle Family’ documentary, 2015)
The documentary is very informative and is interesting to see the artist’s approach and visions for their works and the many different projects they have embarked upon. It was also interesting to hear the objective of the works, Mark said :
“The objective is to teach ourself to see“.
I found this statement quite thought provoking as an artist myself, this is what I constantly strive to do, to see exactly what is in front of me and portray it to the viewer as I would like them to see it.
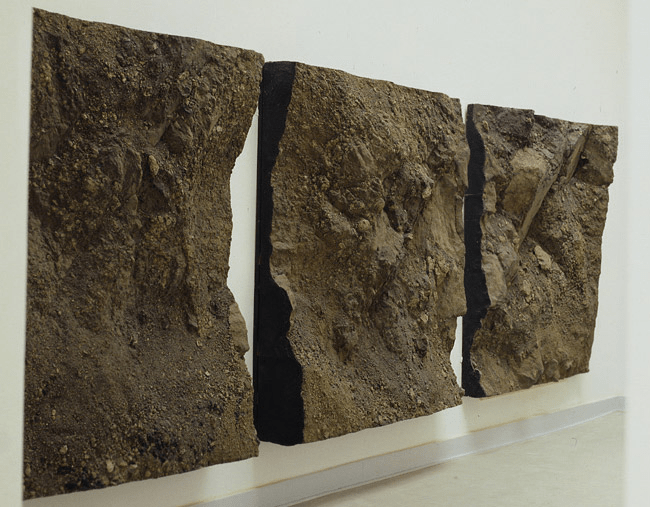
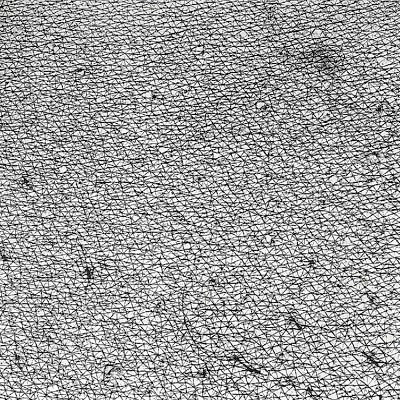
The Boyle Family, all have an innovative approach to art-making, which involves the replication of real-life surfaces and landscapes. They are particularly renowned for their “Earth Studies” series, where they recreate sections of the Earth’s surface in three-dimensional relief, capturing the texture, composition, and detail of specific locations.
Fig.8 Bergheim Mine Study (1974)Fig.9 Rock and Scree Series (1977)
Another study which I found interesting is called “The Multi Human Being series”. Which was the study of different parts of the body. Mark himself took top layers of skin from different parts of his body and then created images from them using a projector.
Fig. 10 Skinchart for Body Work (1969)
Fig. 11 Skin Series, Left Heel Study (1969)
Fig. 12 Skin Series, Small Back Study (1973)
Overall, I find their work challenges traditional notions of what constitutes art and encourages viewers to reconsider their perception of the world around them. I also think, there is a fine line with some of their work. Is it art? or a contribution to science? Is it the study of our planet and everything that resides within it?
After researching these artists I chose Emma Stibbon to ask myself the following questions about her artwork:
How do they choose their subjects?
Emma has a strong desire to document the impact of both natural and human-caused events either on large-scale canvas or via printing methods. In her work, she captures the stunning scenery of the places she visits, but she also records the environmental changes that are taking place. For example, glaciers have broken down before her very eyes as she watched from her moving boat.
How do their creative and material approaches differ?
Emma’s creative approach differs from working in the field to working in her studio. Whilst in the field she often collaborates with scientists and geologists that give her information on why something is happening and she has to work at speed to capture the information.
When back in the studio, Emma can use her sketches and digital photos she has taken as reference for her large-scale artworks, and she can be much more experimental and spend longer on fine details. Often, she will incorporate materials taken from the environment she was in. Such as volcanic ash, which she then mixes into ink and uses in some of her artworks.
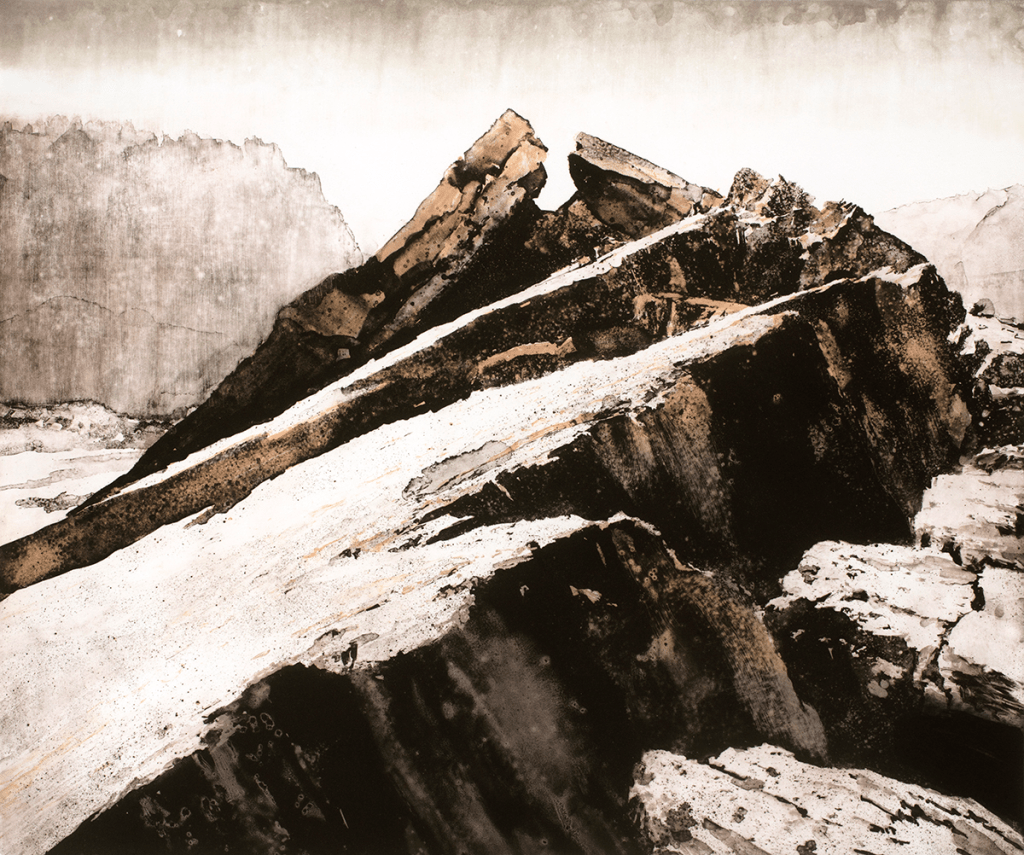
Below is an example of one of these artworks, this particular one is from a volcanic scene.
Fig. 13Broken Terrain (2017).
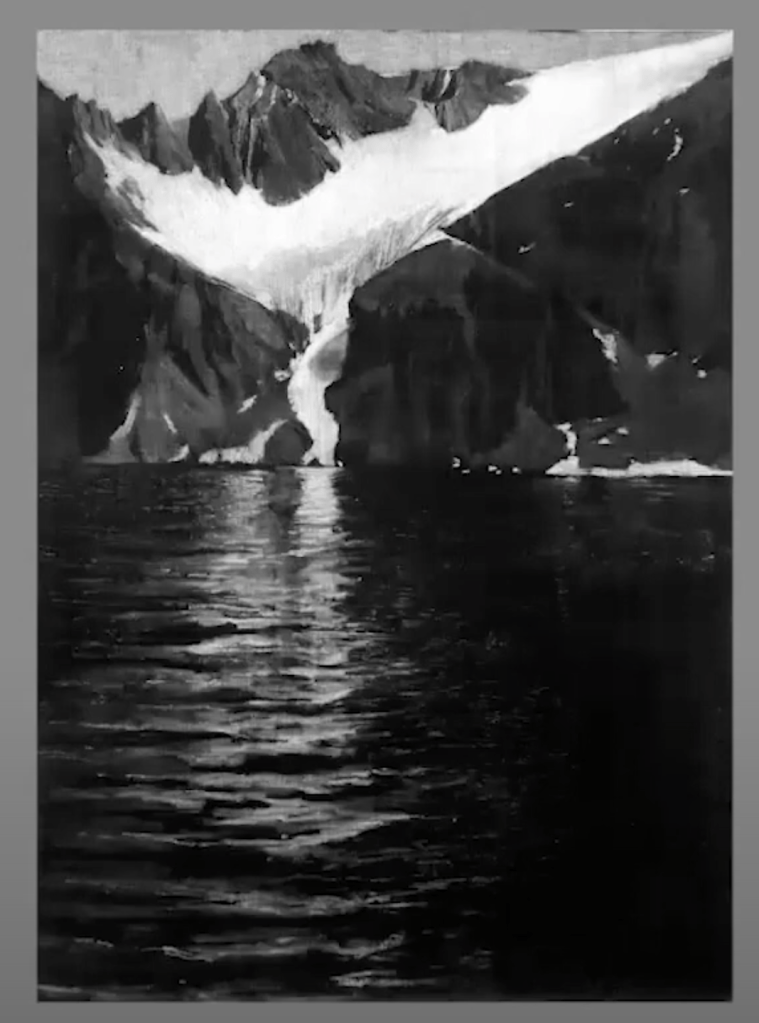
The reason Emma includes materials from the environment she study’s are to create a metaphor in her artworks. Another example where she has done this is in her work, “Tidewater Glacier chalk on Blackboard“.
Fig. 14 Tidewater glacier chalk on blackboard (n.d.)
This image is created using chalk on a blackboard. The irony is in the possibility that the chalk could vanish in an instant, much like a glacier melting away.
There is something quite special about looking at Emma’s large-scale images. The places Emma chooses to draw are places that not many people will ever get to see in their lifetime and being able to look at these works allows each viewer to experience some of the magic that Emma must have witnessed whilst out in the field.
Why do they make their work at a large scale?
While watching the film below, Emma revealed why she does her art on such a massive scale. In the documentary, she stated:
“I sort of want the reason for the big scale is that sort of sense of encounter for the viewer. I really want the sort of sense about being immersed in something for an audience that might sort of see that in a space to give a sense of the physicality of being in front of it.” (Stibbon, E 2023)
It was nice to hear her say this. As I had previously mentioned, I felt the pieces were for the viewer to get a better understanding of the places she had been witness to. The vast scale allows the viewer to fully immerse themselves in the scene, which is similar to watching a film at the cinema.
(at home: Artists in Conversation | Emma Stibbon, 2023)
What hurdles have they encountered or initiatives have they had to develop in order to produce their work?
Whilst in the field, Emma is faced with many obstacles that hinder her such as the cold, seasickness, the wind, the fear of a volcano eruption and the many other elements that the places she visits throughs at her. Therefore, she has to work fast using sheets of carriage paper, inks and watercolour. These mediums are chosen for there ease of use and they are good at capturing the characteristics of the environment at speed. Emma, also said in a documentary that “The paper is a witness of the weather, and it is embedded into the media” (Stibbon, E 2023) Additionally, she will use a digital camera to record information for later use.
Reflection
It has been interesting to see the different style and approaches that theses three artist have used whilst creating their large scale works. Out of all of them, I have to say my favourite is Emma’s work. The whole process from start to finish is quite fascinating. Being able to visit remote countries, recording information whilst there and then coming home and capturing the scenes at such a large scale but with such realism is remarkable.
Gallery, Rabley. “Emma Stibbon RA – Broken Terrain.” Rabley Gallery, 2 Aug. 2020, rableygallery.com/shop/artists/emma-stibbon/emma-stibbon-ra-broken-terrain/. Accessed 18 Mar. 2024.
Robbins, Andy. “The Culture Show: John Virtue.” Vimeo, 6 July 2012, vimeo.com/45322786. Accessed 18 Mar. 2024.
Roberts, Cristea. “Emma Stibbon.” Cristea Roberts Gallery, cristearoberts.com/artists/33-emma-stibbon. Accessed 18 Mar. 2024.
Spira, Freyda , and Robert l. “At Home: Artists in Conversation | Emma Stibbon.” Www.youtube.com, 16 June 2023, youtu.be/l3PtnhGeVyI. Accessed 18 Mar. 2024.
CONTENT CONTAINS SOME EXPLICIT IMAGES DUE TO LIFE DRAWINGS OF NAKED MODELS.
Option one: Rapid Portraits
Brief:
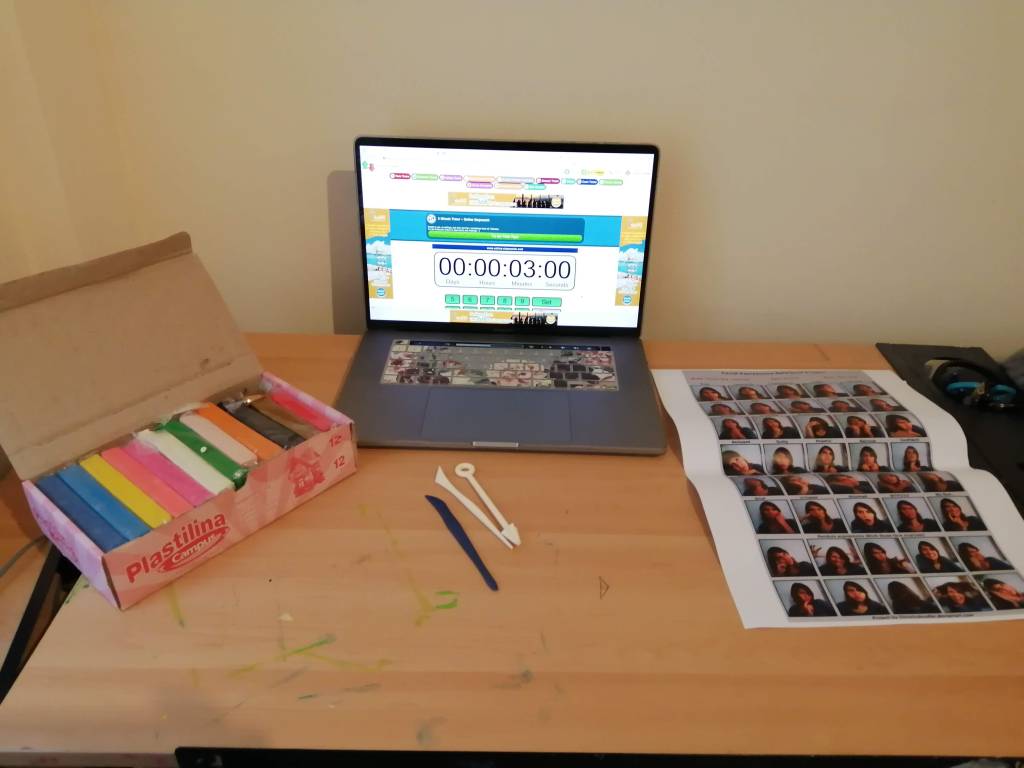
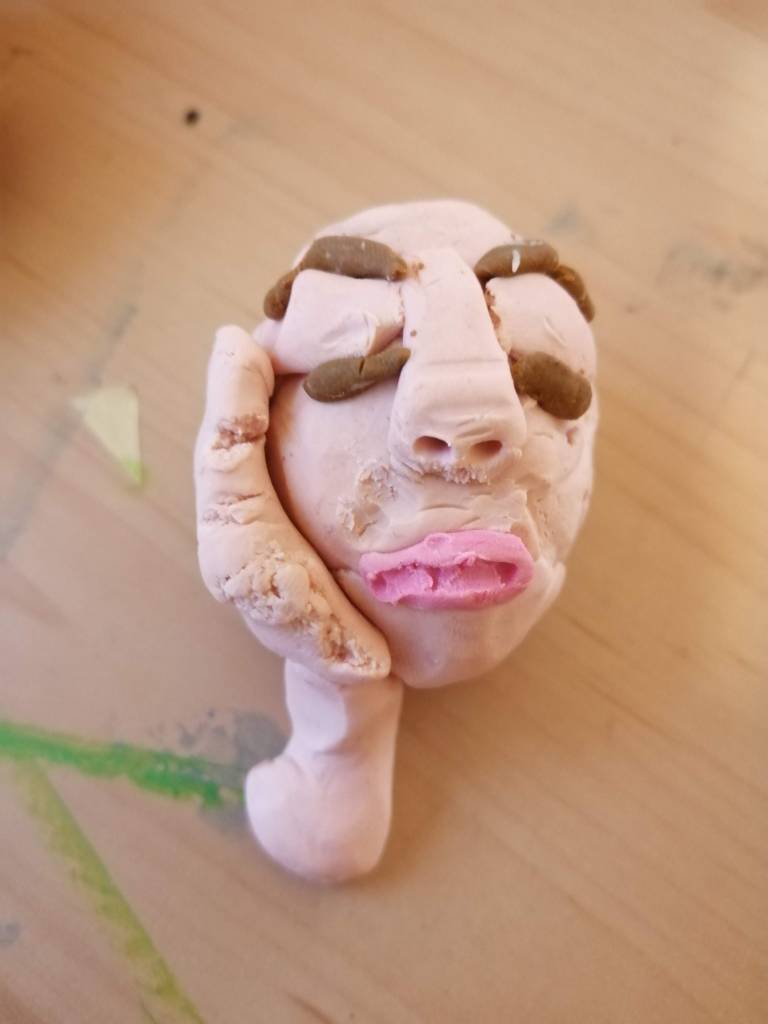
For this exercise, I had to use a modelling material to produce a range of rapid portraits. With a maximin time of three minutes for each model.
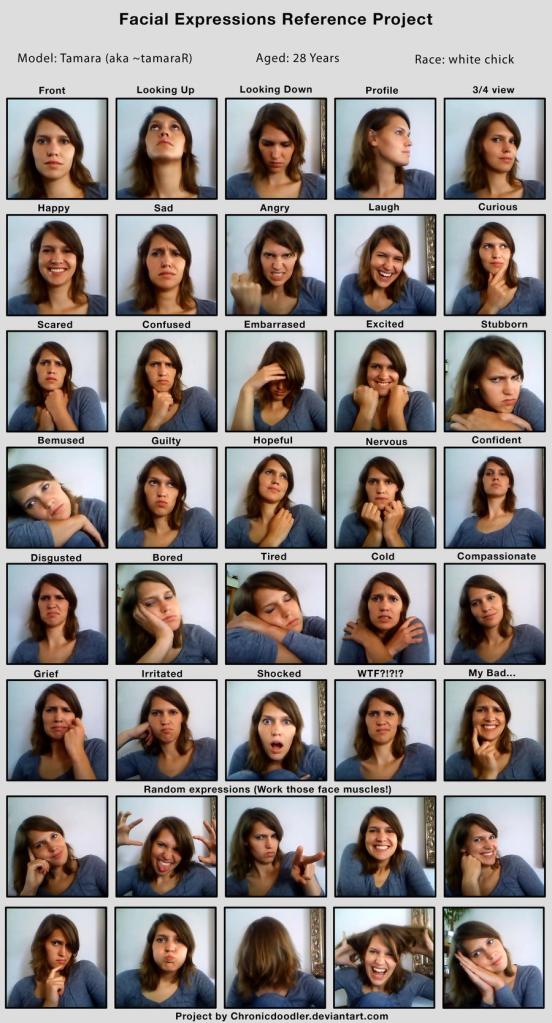
To begin the exercise, I printed off a selection of portrait expressions from the internet that I wanted to try and capture. From this reference photo, I picked ten to try and model with my selected material.
Fig. 1 Facial Expressionsreference project (2012)
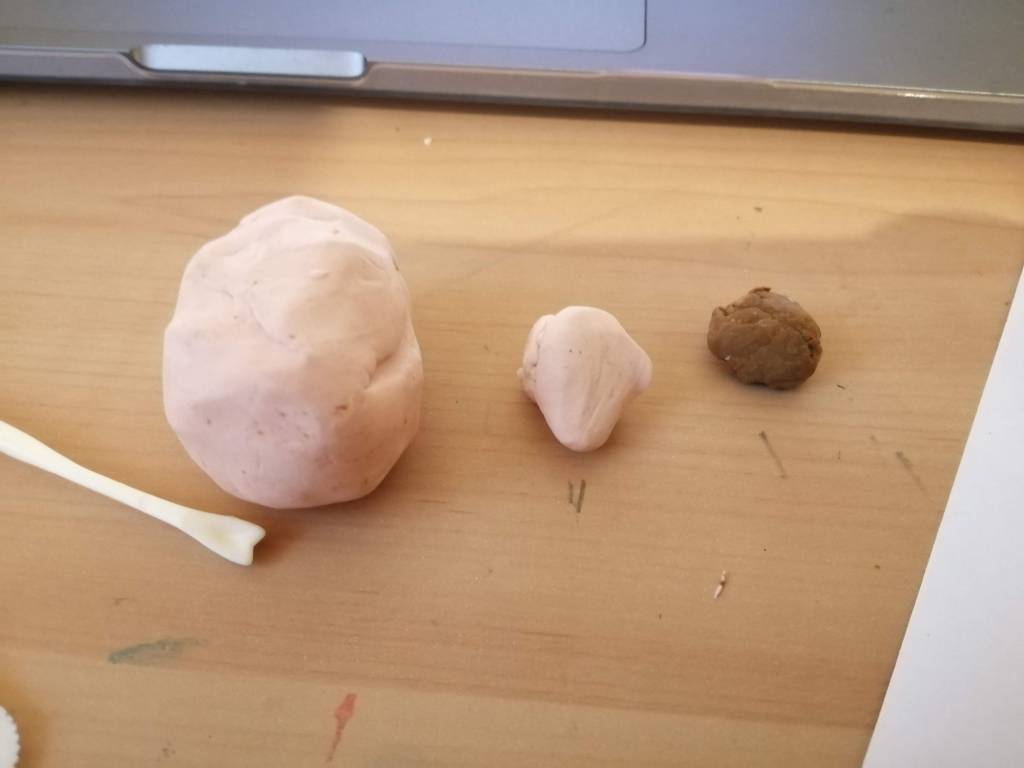
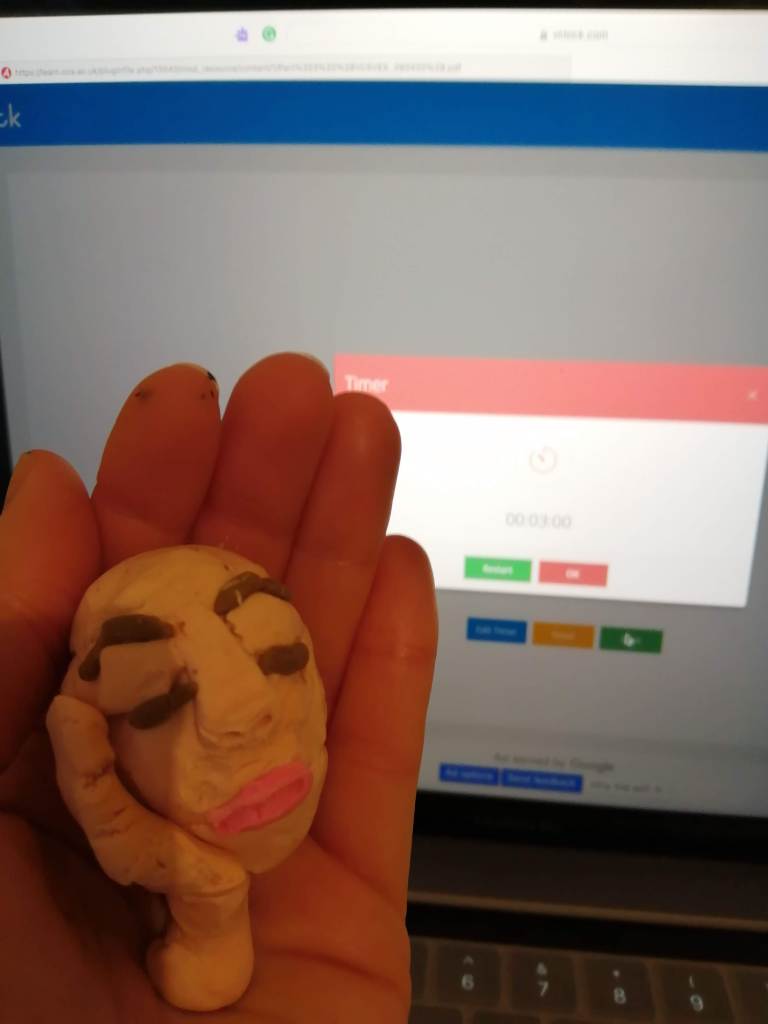
Next, I gathered some of my son’s plasticine modelling clay that he uses for animation purposes, some modelling tools and put a three-minute timer on my laptop.
Fig. 2 Materials (2024)
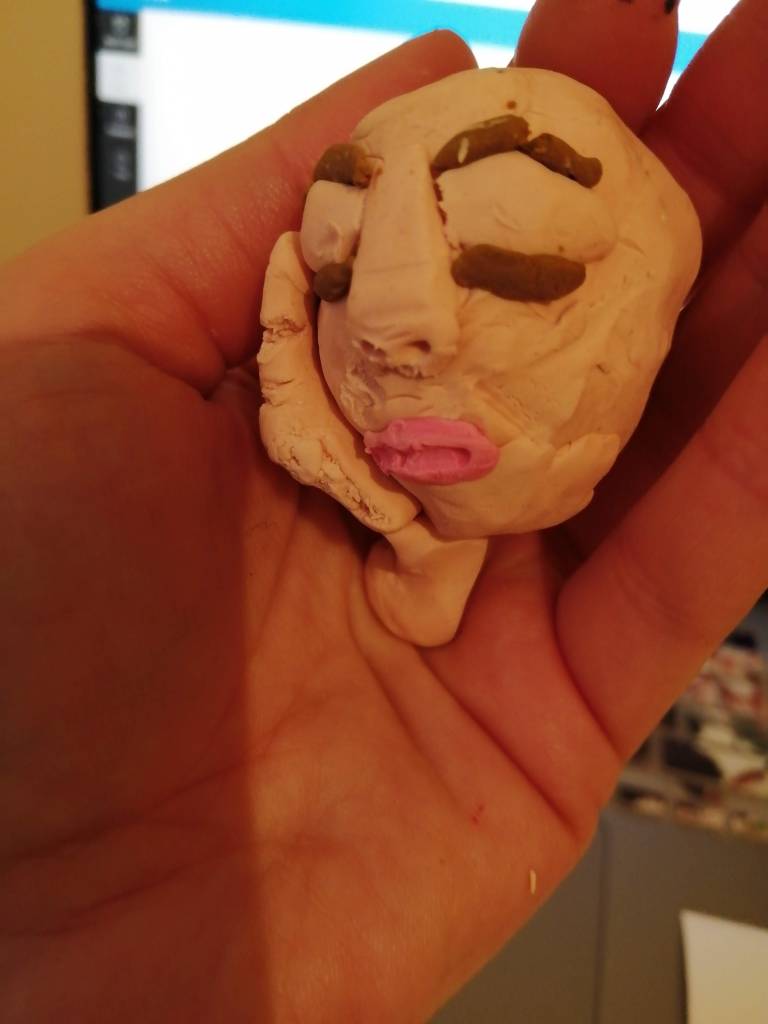
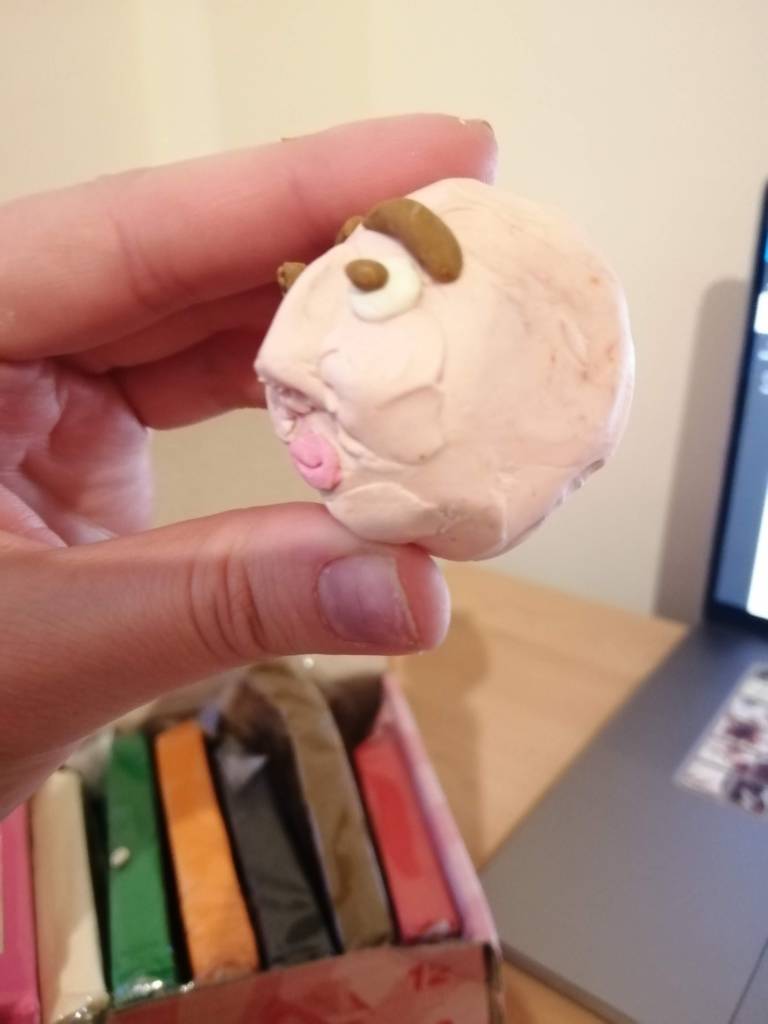
Below are ten facial expressions I tried to capture with my portrait models.
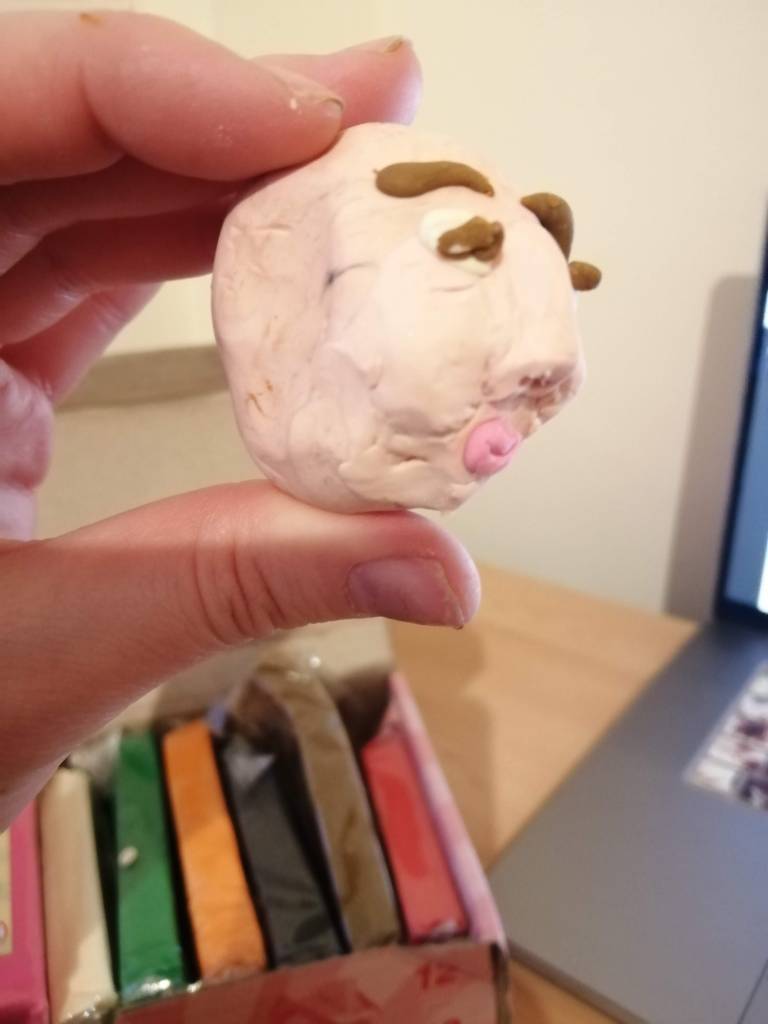
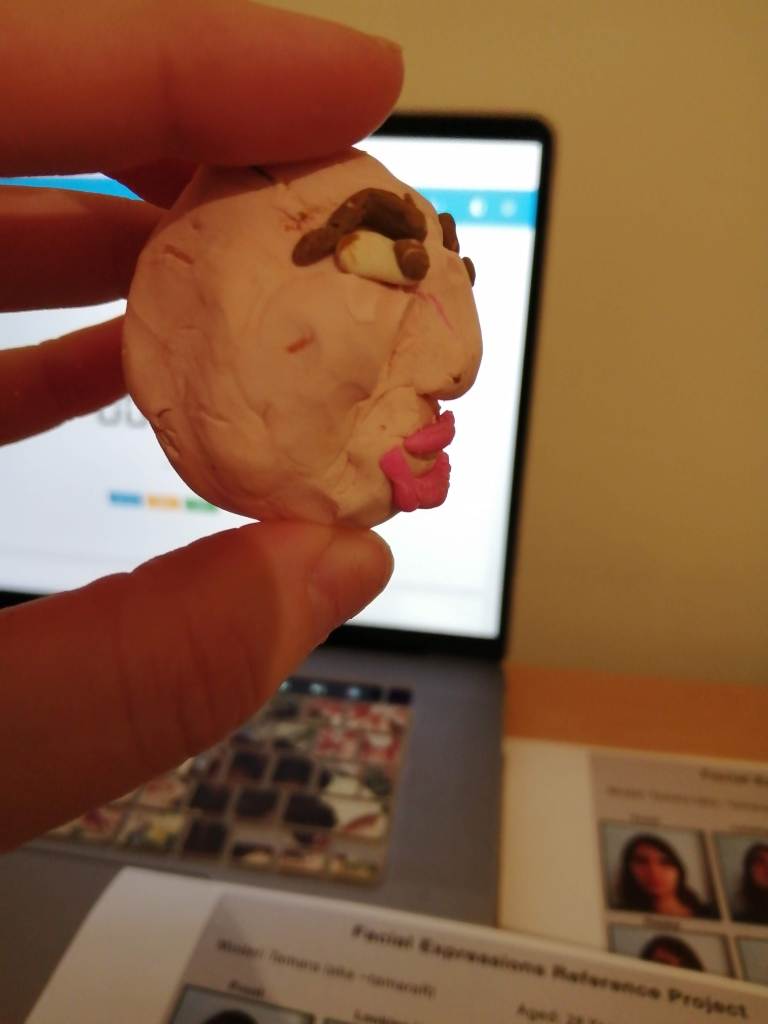
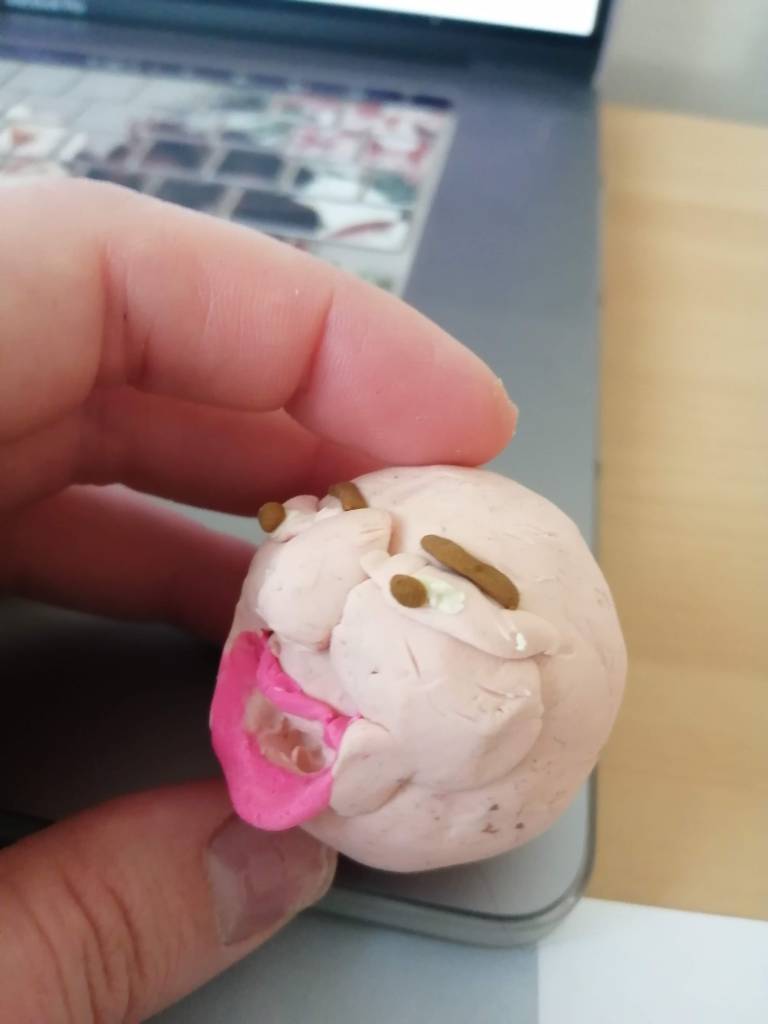
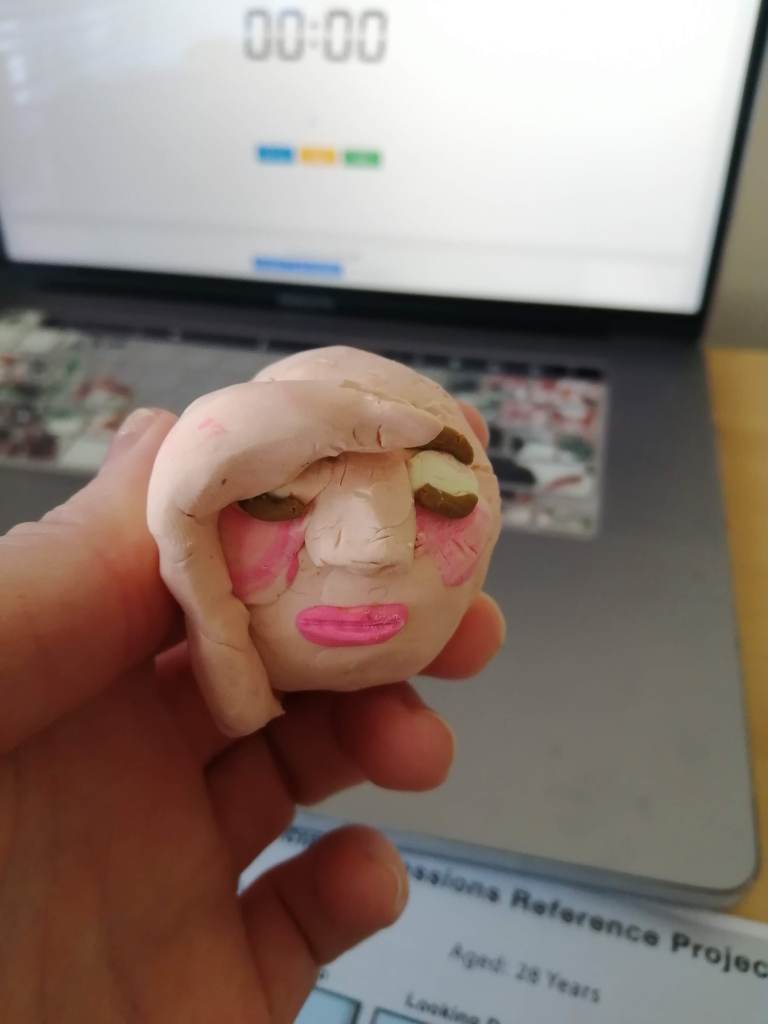
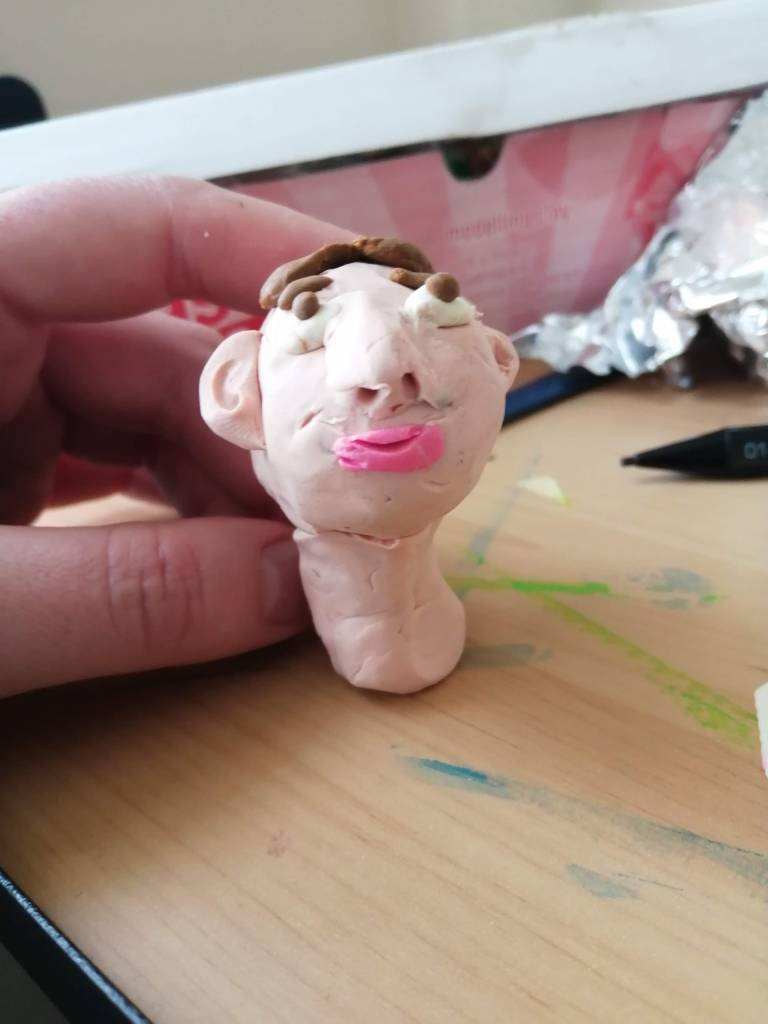
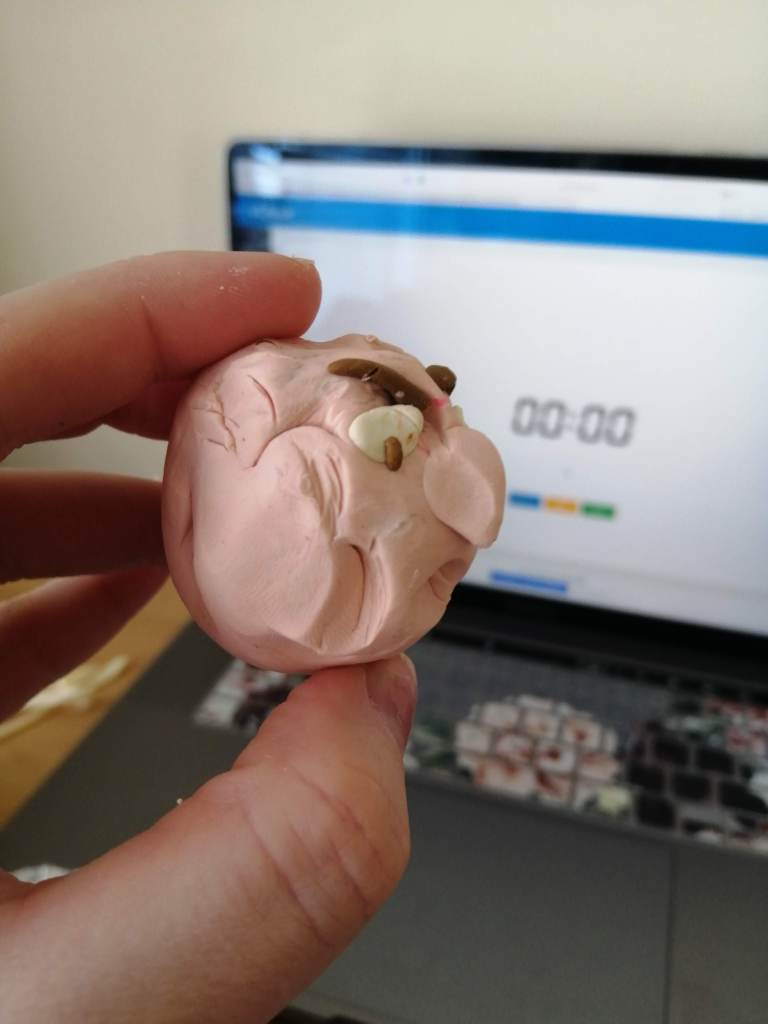
Shocked
Fig.3 Shocked (2024)
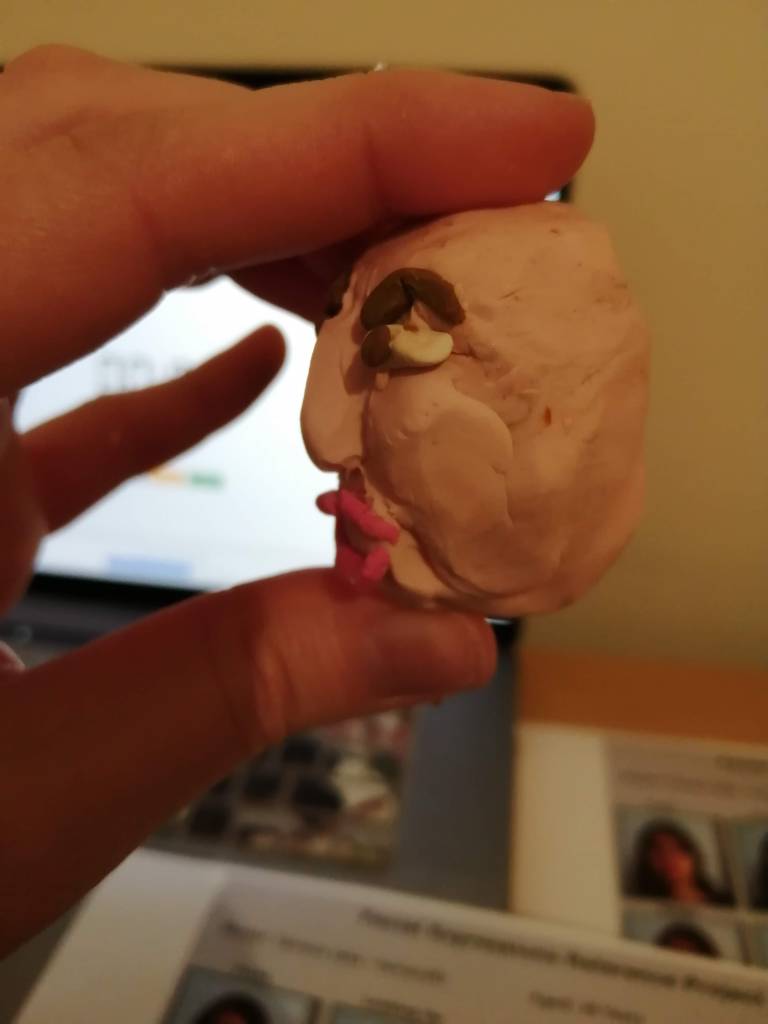
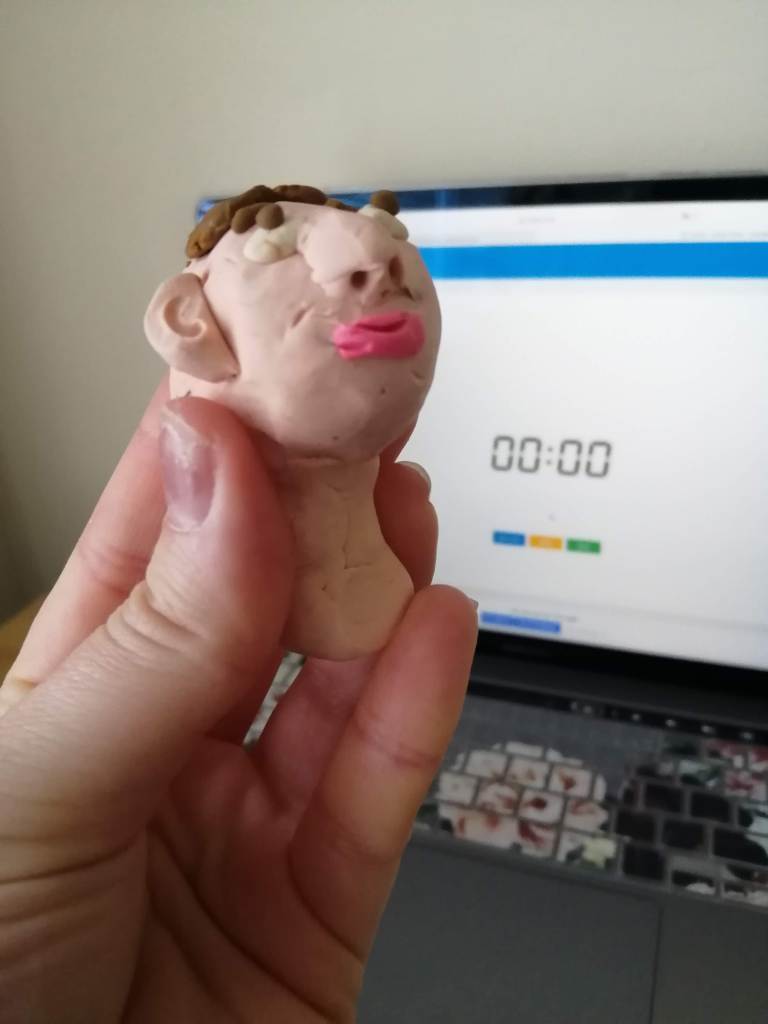
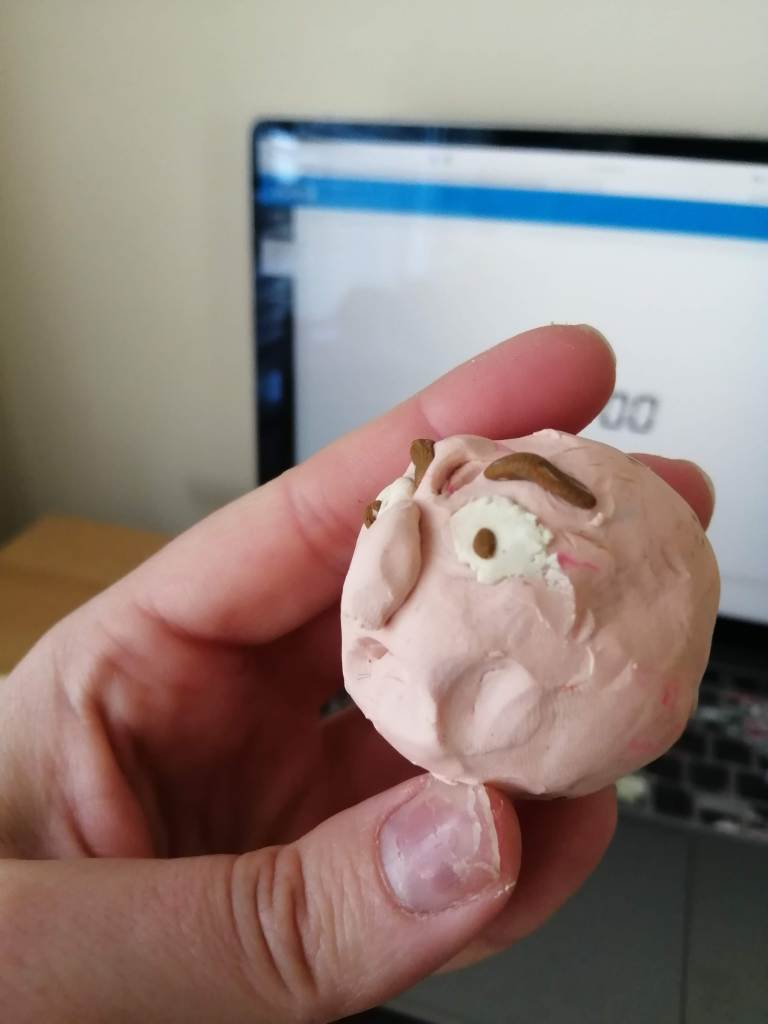
Tired
Fig.4 Tired (2024)
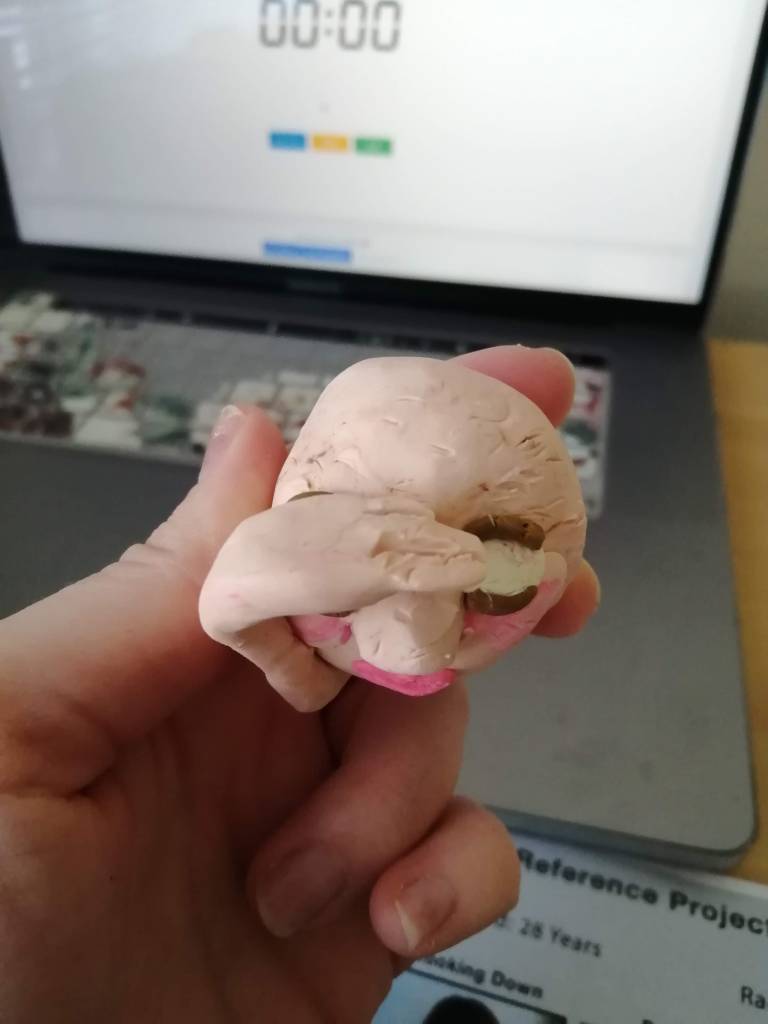
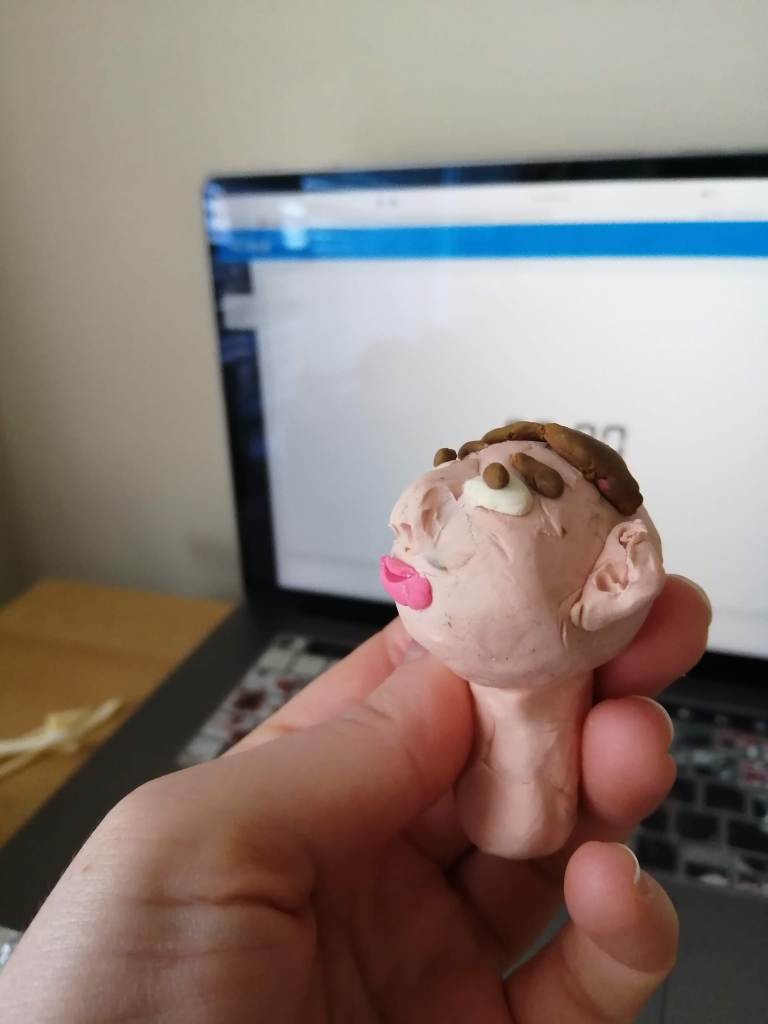
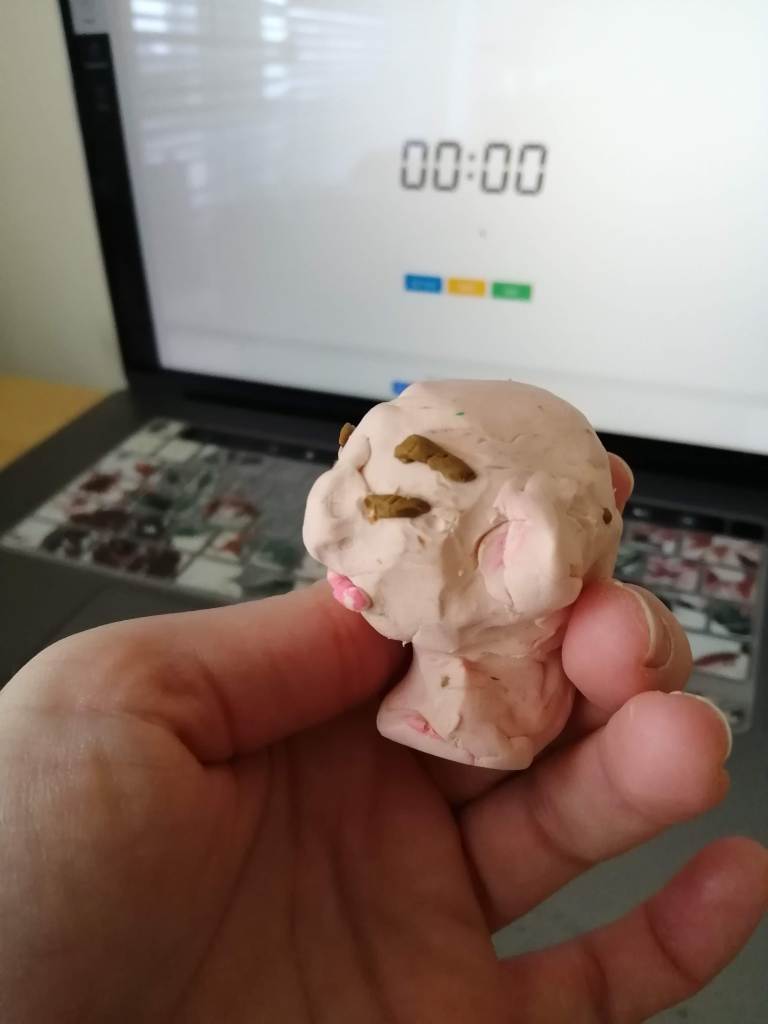
Holding breath
Fig. 5 Holding Breath (2024)
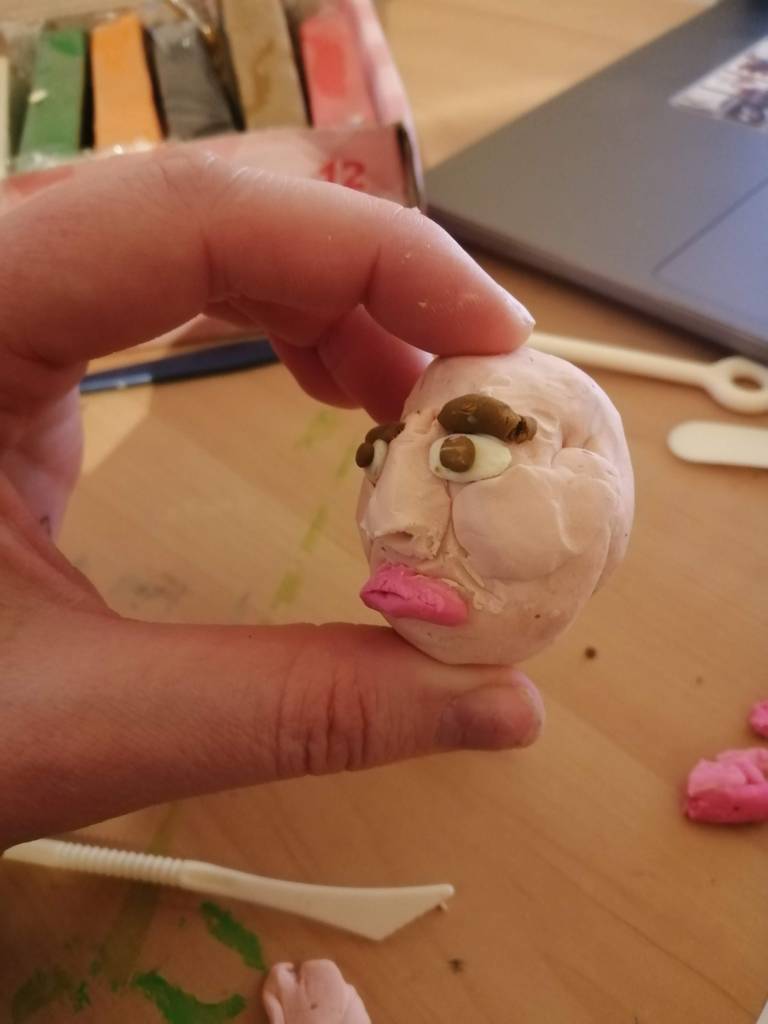
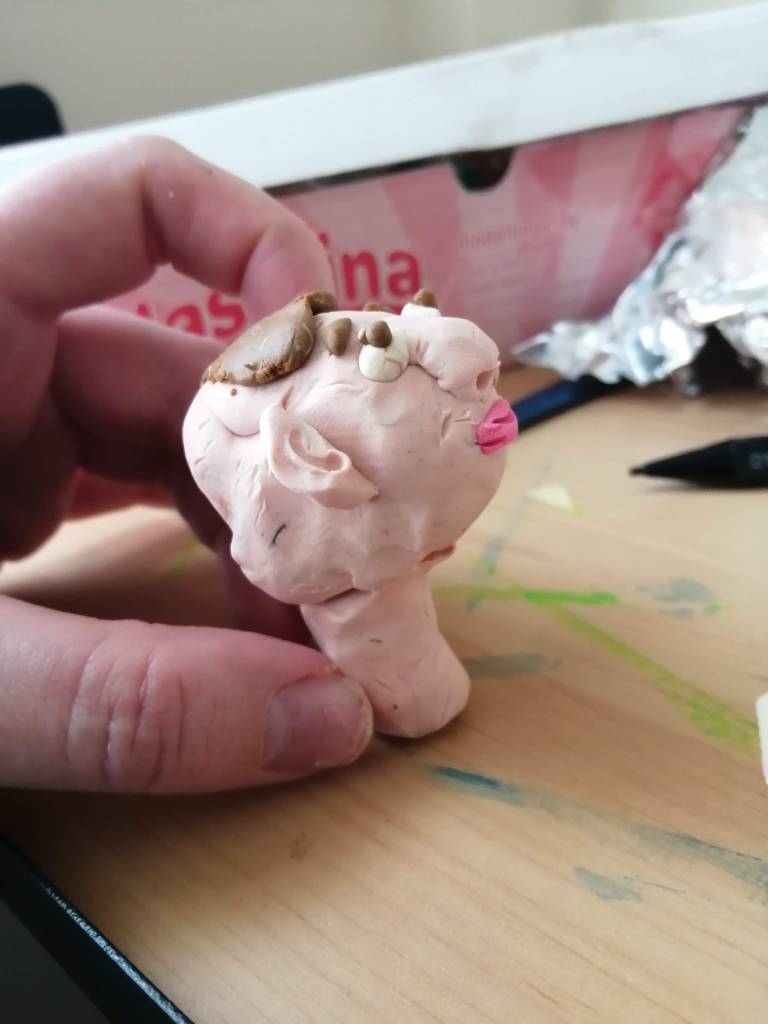
Angry
Fig. 6 Angry (2024)
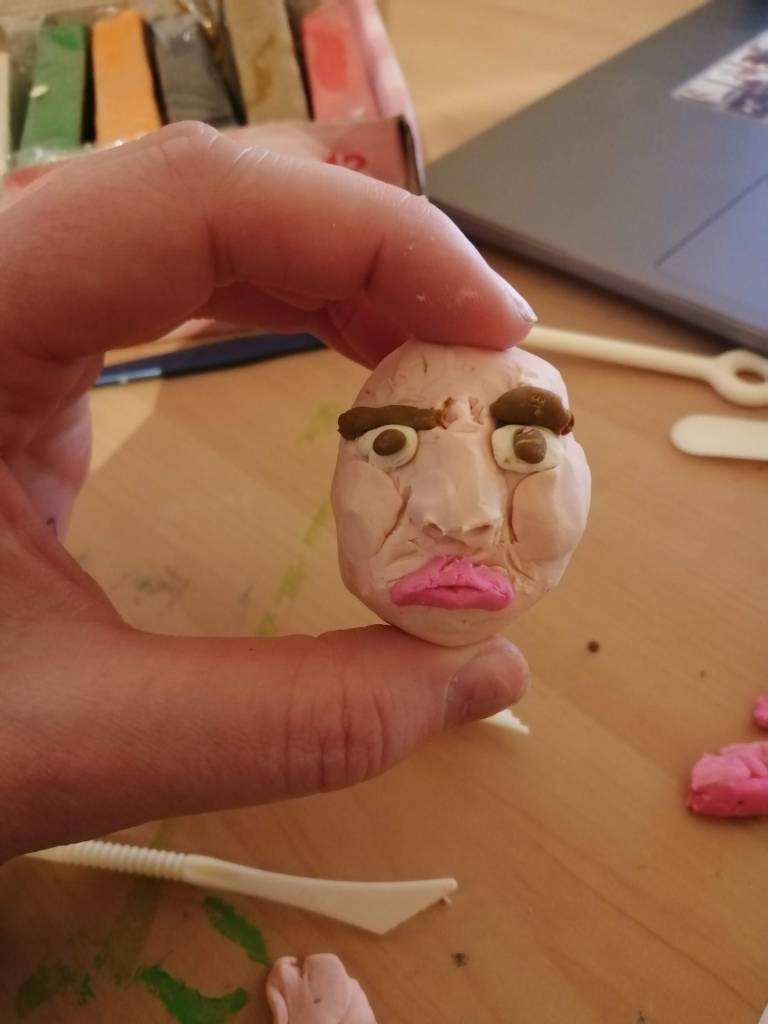
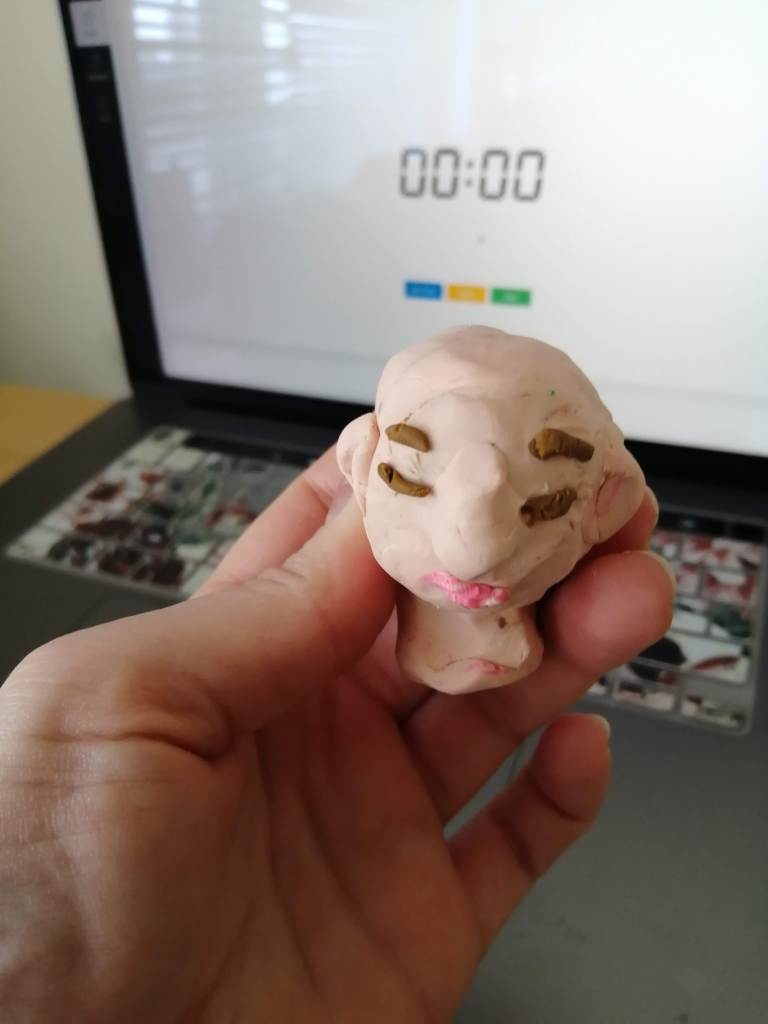
Resting face
Fig. 7 Resting face (2024)
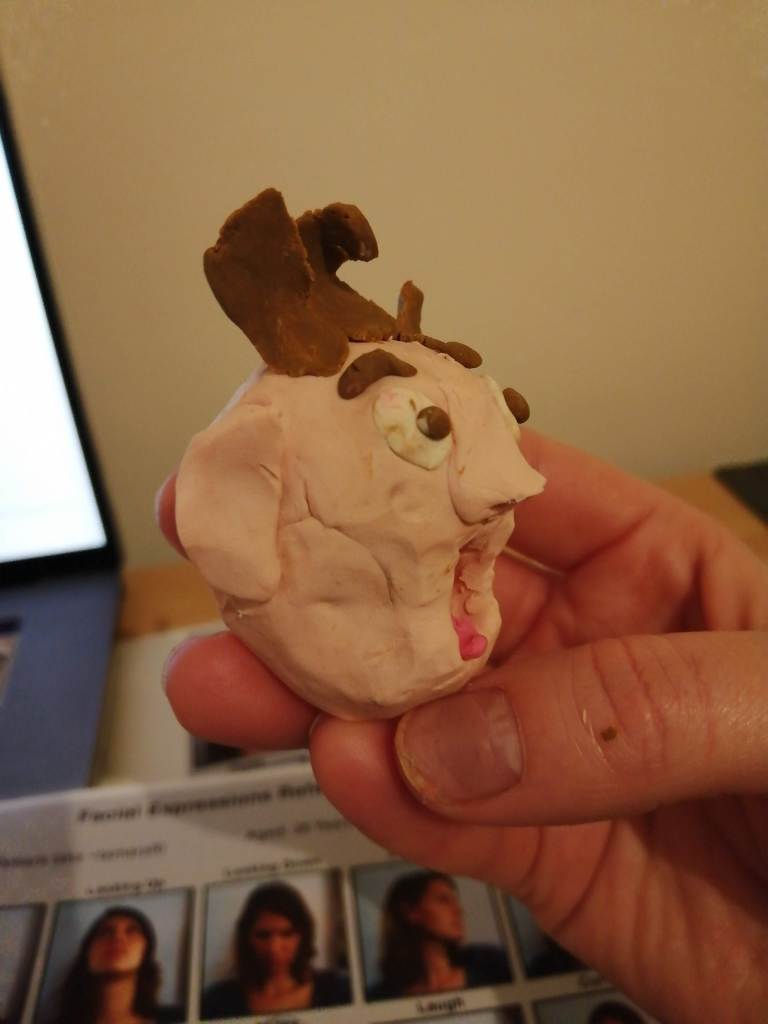
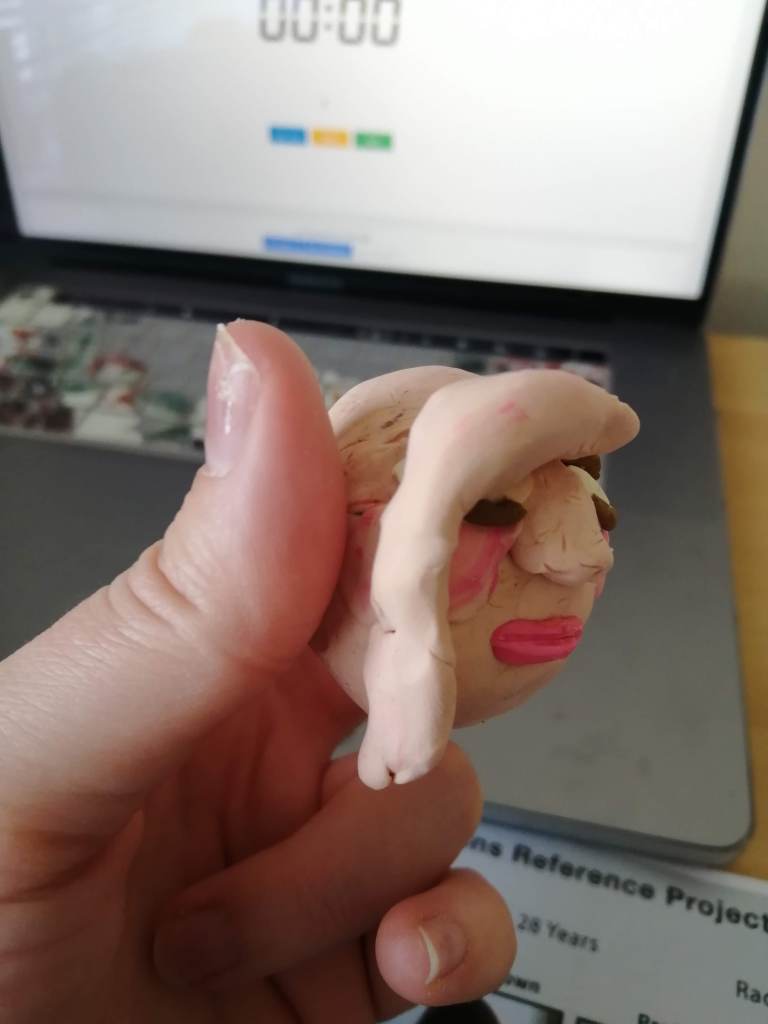
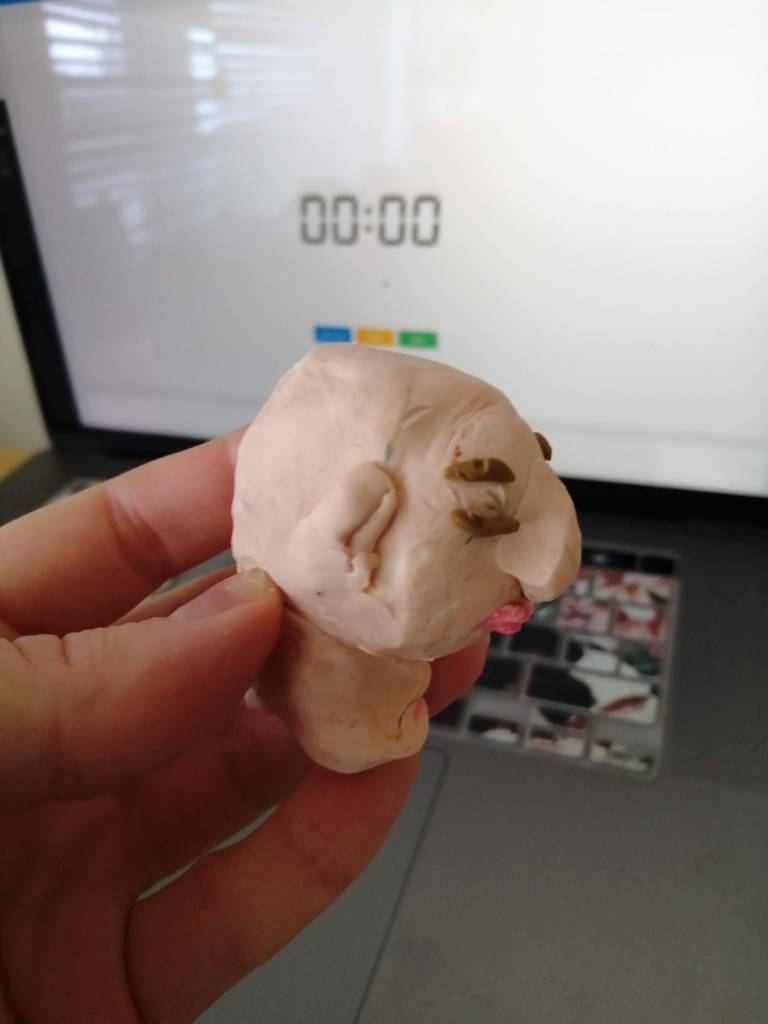
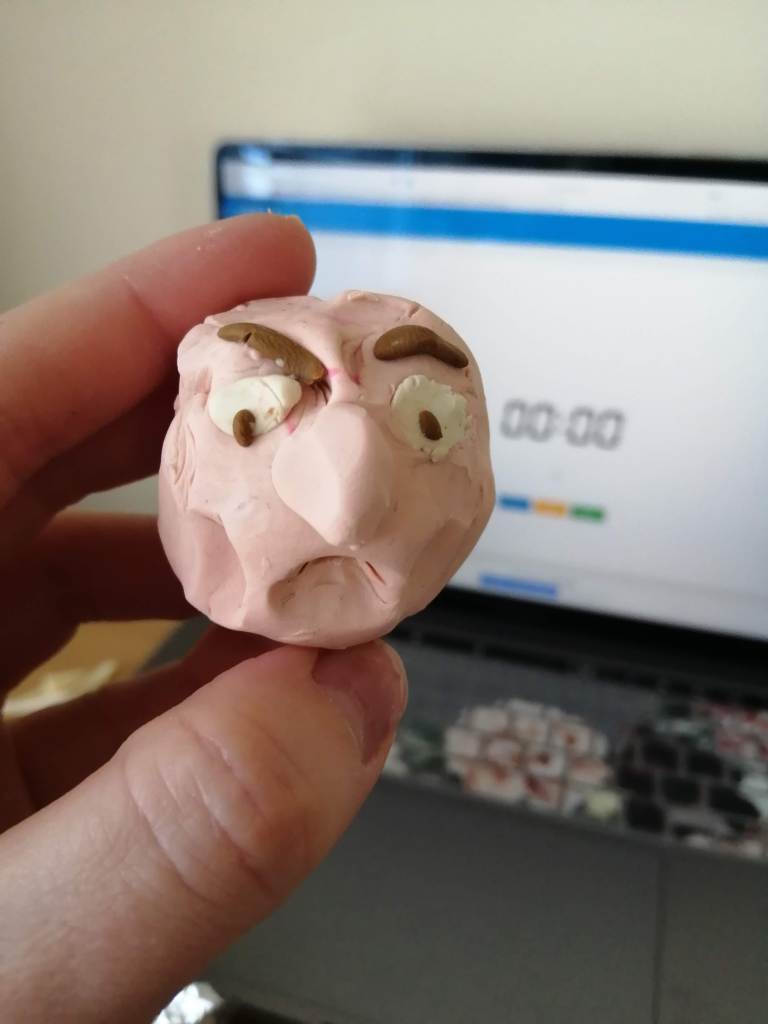
Scared
Fig.8 Scared (2024)
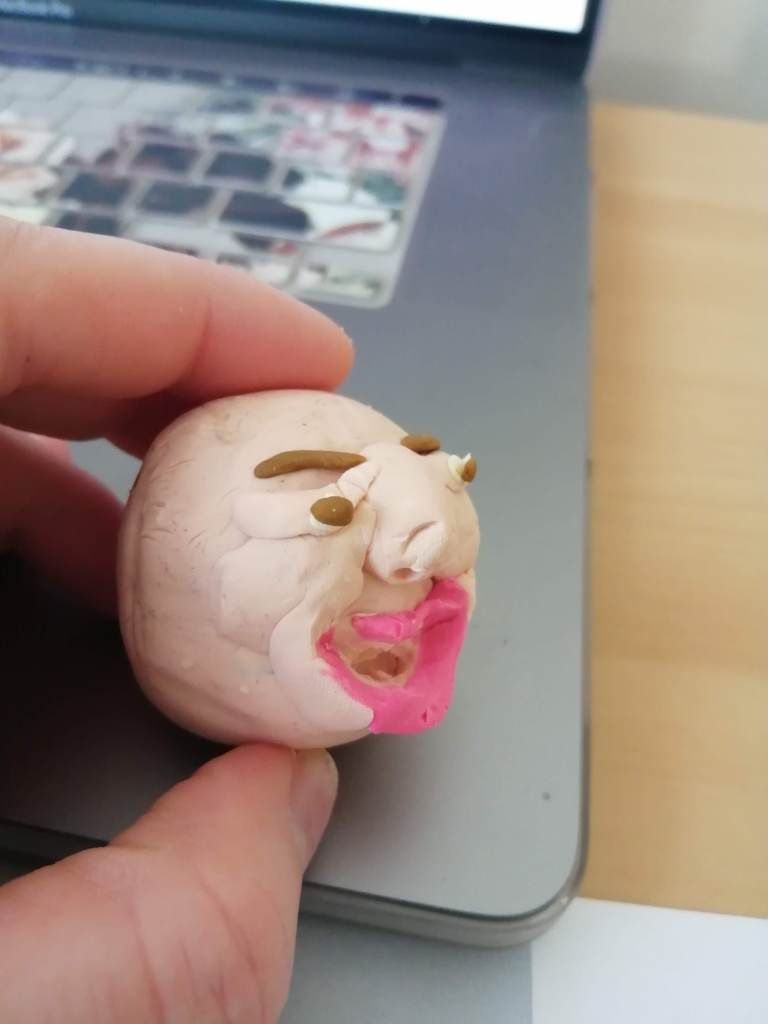
Laughing
Fig.9 Laughing (2024)
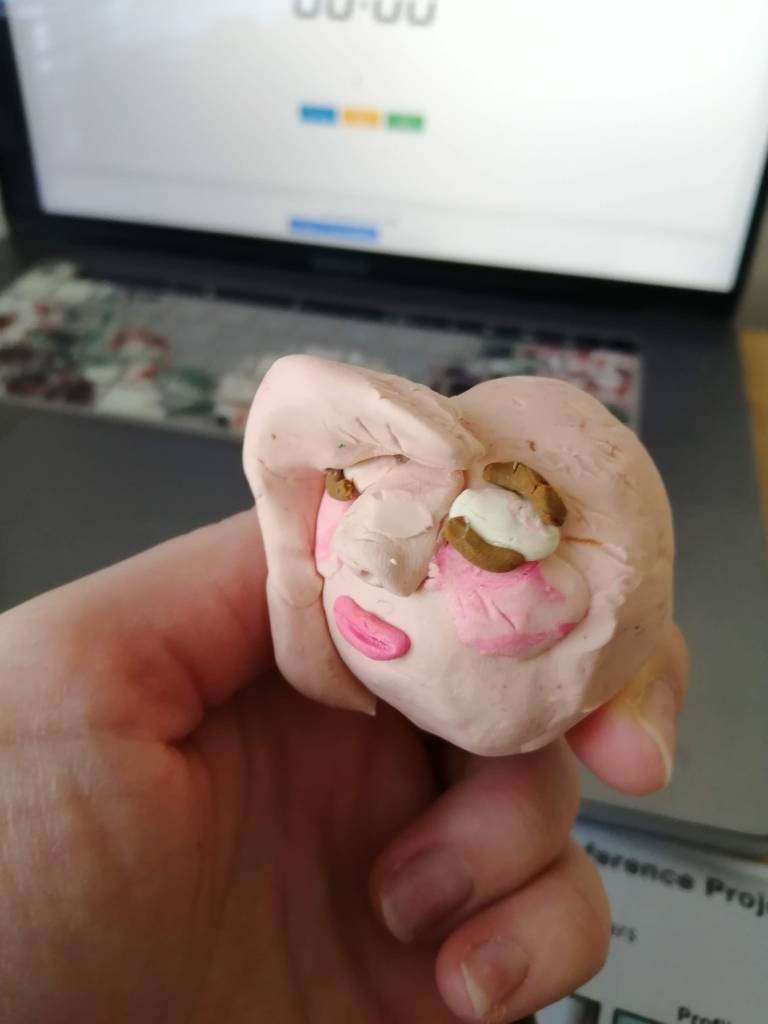
Embarrassed
Fig. 10 Embarrassed (2024)
Looking up
Fig. 11 Looking up (2024)
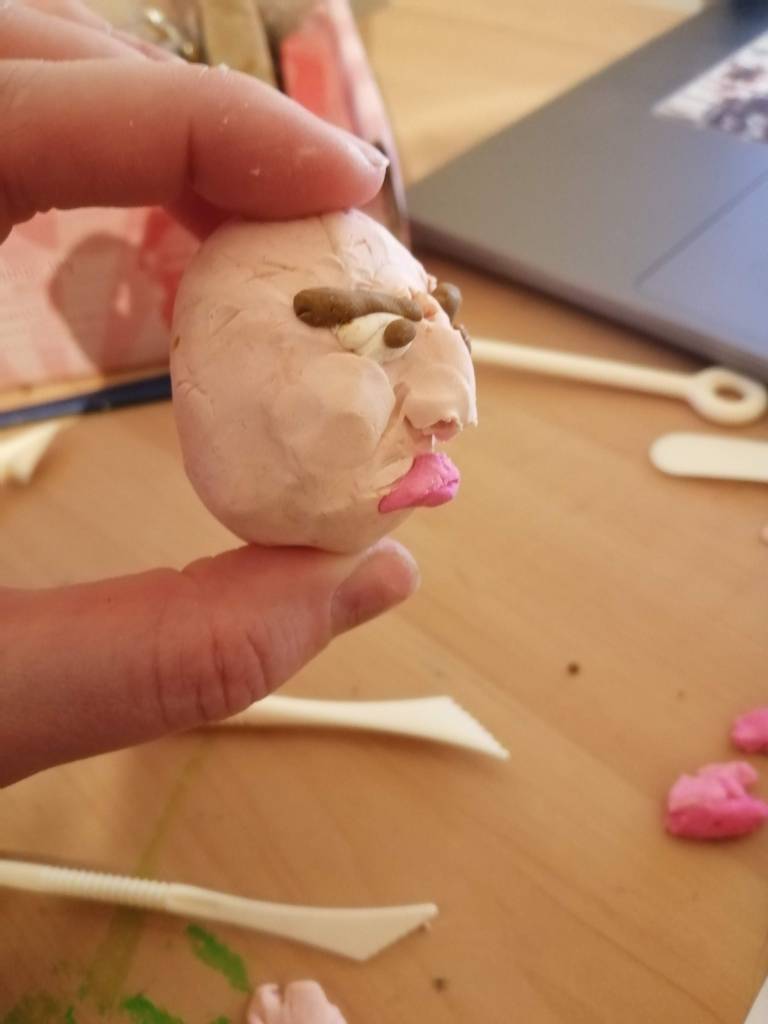
Looking down
Fig. 12 Looking down (2024)
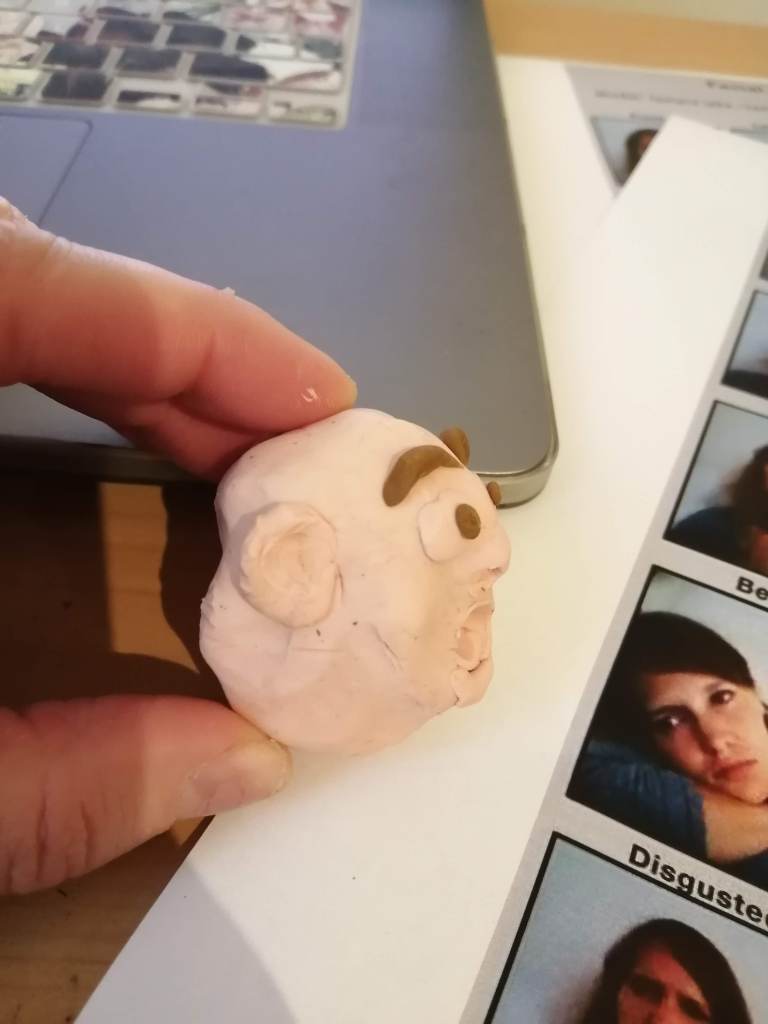
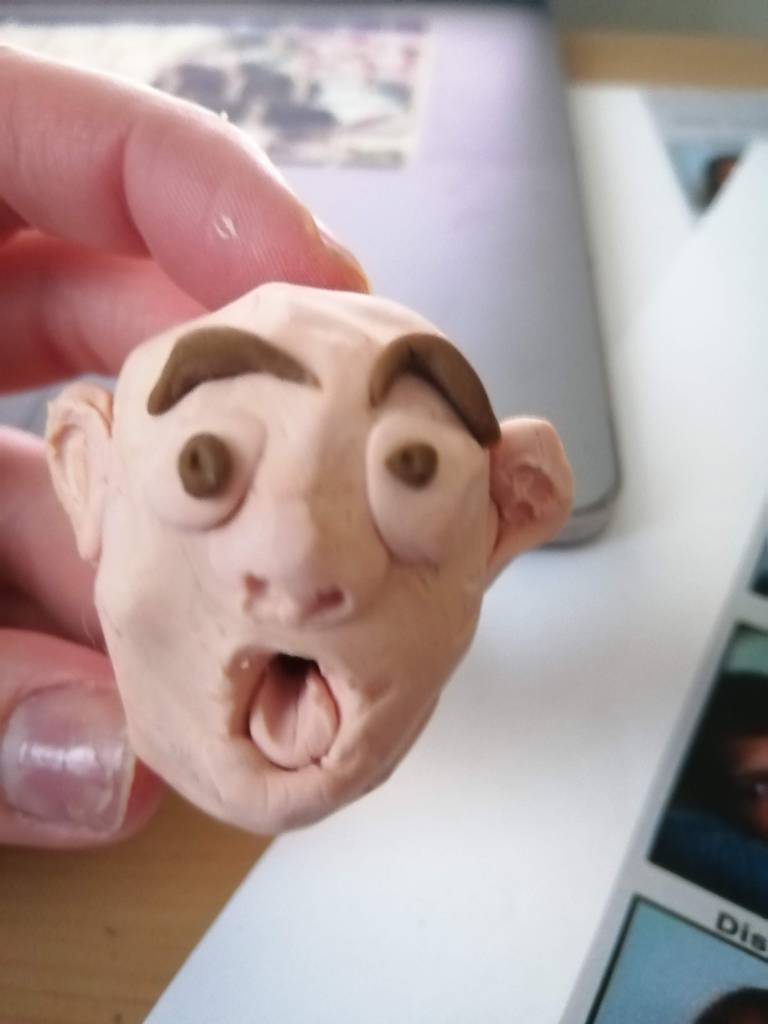
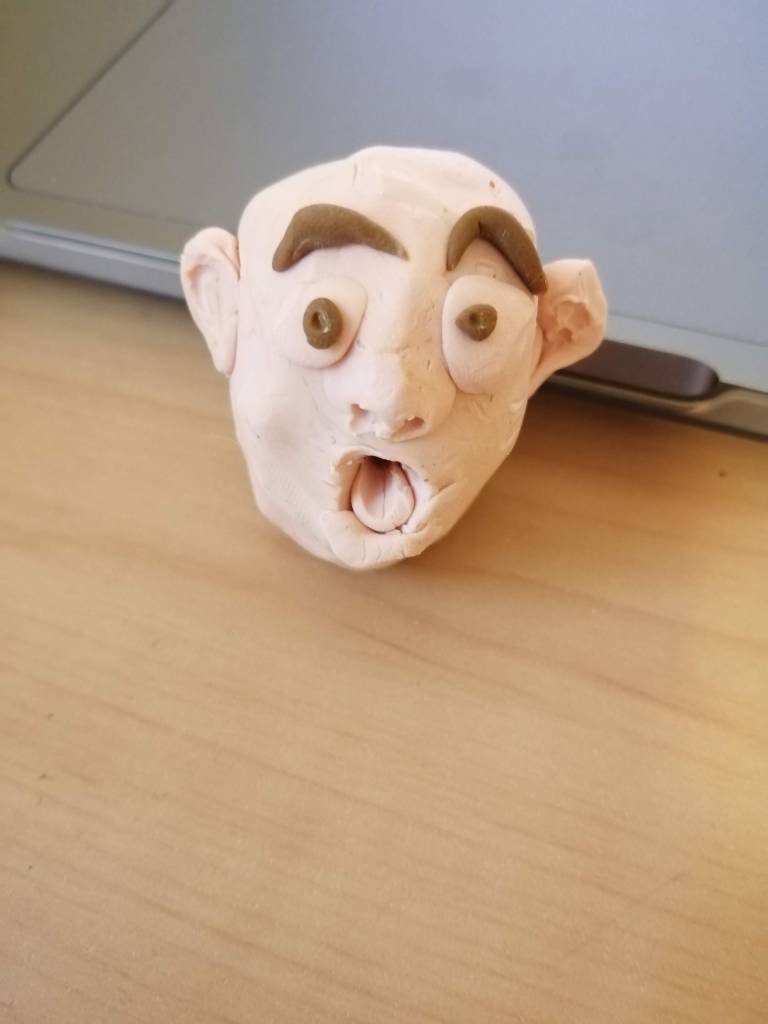
For an extra challenge, I tried to capture a confused facial expression with a one-minute time limit.
Fig.13 Confused (2024)
Reflection
I really enjoyed this exercise. I often find I don’t leave enough time to play in my work and this was just that playing. As an older child, my favourite hobby was sculpture and making pots on my refurbished potter’s wheel. So, to be able to sit and sculpt portrait models was not only fun but I was able to reminice.
Working with the clay rapidly was made challenging by the three-minute timer. I haven’t used plasticine since I was maybe seven years old, and I forgot that it’s fairly hard and requires hand warming before handling. Therefore this was an extra challenge.
Seeing how much expression I could achieve in the allotted time was interesting but I was happy with how much information I could portray with each sculpture. The ones that I struggled with the most were the ones that were smiling and looking down. It’s interesting to see that I also have difficulty when I try and draw these angles. So maybe to get better at them, I need to study them more in my sketchbook.
If I was to try this again it would be interesting to see how the sculptures would look using a single-colour clay. Would I still capture all of the expressions?
Another option
Option two’s brief appealed to me too and I believed it would enhance my illustration capabilities, even though I could have completed Option One alone for this task. It meant I would have the opportunity to do some more exploring.
Option 2: Continuous Line Drawing
Brief
For this exercise, I had to create various continuous line drawings. (This means making drawings without taking my drawing tool off the paper until it is complete. ) With an added challenge of a maximum time limit of three minutes for each.
Research
Before starting to draw, I researched some examples of artists who use this technique in their practice.
Pablo Picasso
One of the masters of art during the 20th century was Picasso. During this time he drew many pictures using continuous lines. It is quite amazing to see the amount of detail and complexity he can convey, in what appears at first to be a simple drawing. When looking at the drawing of the horse below I enjoy how he has captured the sense of movement with his fluid use of line.
Next, I watched the short film below which is about an exhibition of Picasso’s line work dating from his first to last drawings (1901-1969). There are 100 sketches in total some never seen by the public before. What I like about his line work is how expressive and creative he is. In the video, you can see how he challenges himself to look at things in new ways and experiments with lines.
Other well-known artists who use lines are Egon Schiele, Sherrie Levine, Andy Warhol, and Henri Matisse.
Henri Matisse
Matisseproduced artwork during the same time as Picasso and there are some similarities in their artwork such as how they used line. Yet, there are some differences I think Picasso’s work was a little more complex especially when he started experimenting with cubism where his lines become much more angular and intricate. Where as Matise’s work was much more decorative and simplistic.
Al Hirschfeld
Al Hirschfeld was a 20th century illustrator best known for his black and white line drawings of caricatures. He had an impressive nine decades of illustrative work, including working for the New York Times. On the website https://www.alhirschfeldfoundation.org I found many examples of his work to study. I really enjoyed researching his work they are full of movement, humour, expression and cheekiness.
DFT
Next, I wanted to see what illustrators today may be using the continuous line technique in their practice and came across a French duo of artists called DFT (differantly). It excited me to see that their work has attracted interest from world famous brands such as Apple, Hermès, Nike and Adidas.
Below is a video of one of the artist showing how they create their work. I found it incredible how quickly the illustrations were drawn but amazingly there is still such large amounts of detail.
After, researching past and present-day artists that have used this method I have to say I am a little apprehensive at what I will be able to achieve especially with a maximum time-limit of three minutes but looking forward to experimenting.
Continuous line sketches
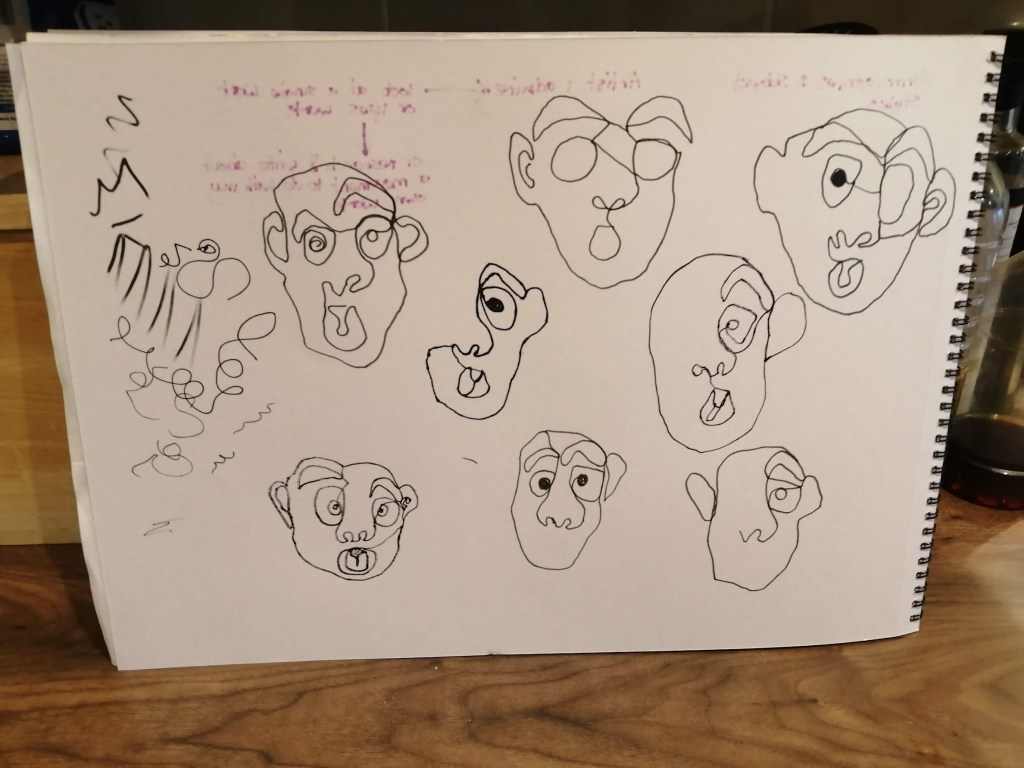
To begin the continuous line sketches I began with a sheet from my sketchbook and used one of my clay models as a still life to draw from. This was a warm up sheet before starting properly as it has been some time since I have sketched anything.
Fig. 14 Warm up sketches (2024)
I was surprised at how difficult it was to record information quickly without lifting my pen off the paper and found that I seemed to be only able to record half the face unless I went back over some of the lines I had previously drawn.
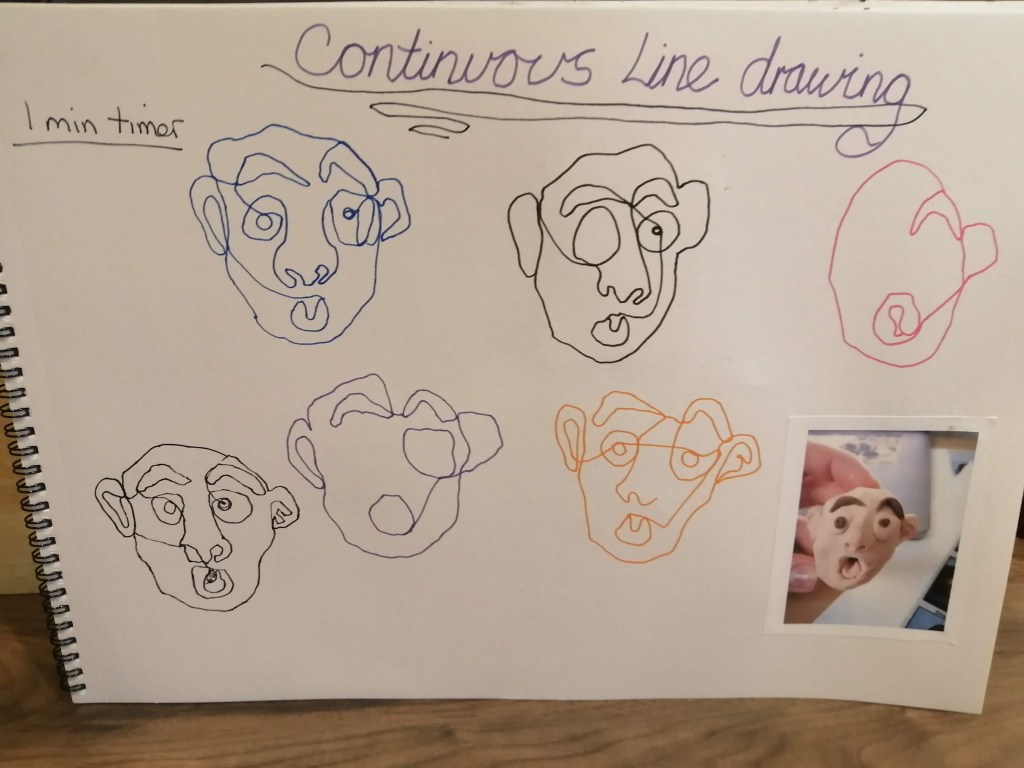
Now that my hand and eye coordination had warmed up, I set my timer for one minute and began sketching the same clay model.
Fig. 15 Shocked line drawing (2024)
Interestingly, with more practicie the lines to each of the drawings are now much more fluid and I am able to record more information.
Fig. 16 Tired line drawing (2024)
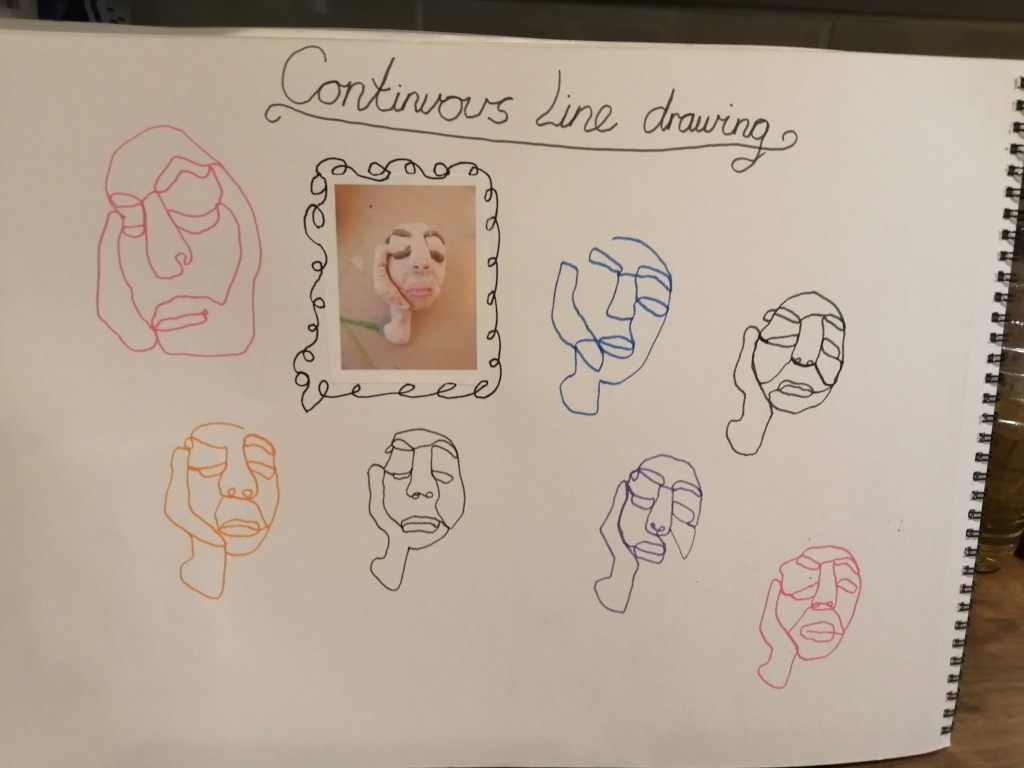
Again, setting my timer I practiced more continuous line drawings. Once more, I used one of my sculptures to practise this. The hand added an additional element to the face’s shape, making it more difficult to capture, but overall, I believe the sketches capture the essence of the sculpture.
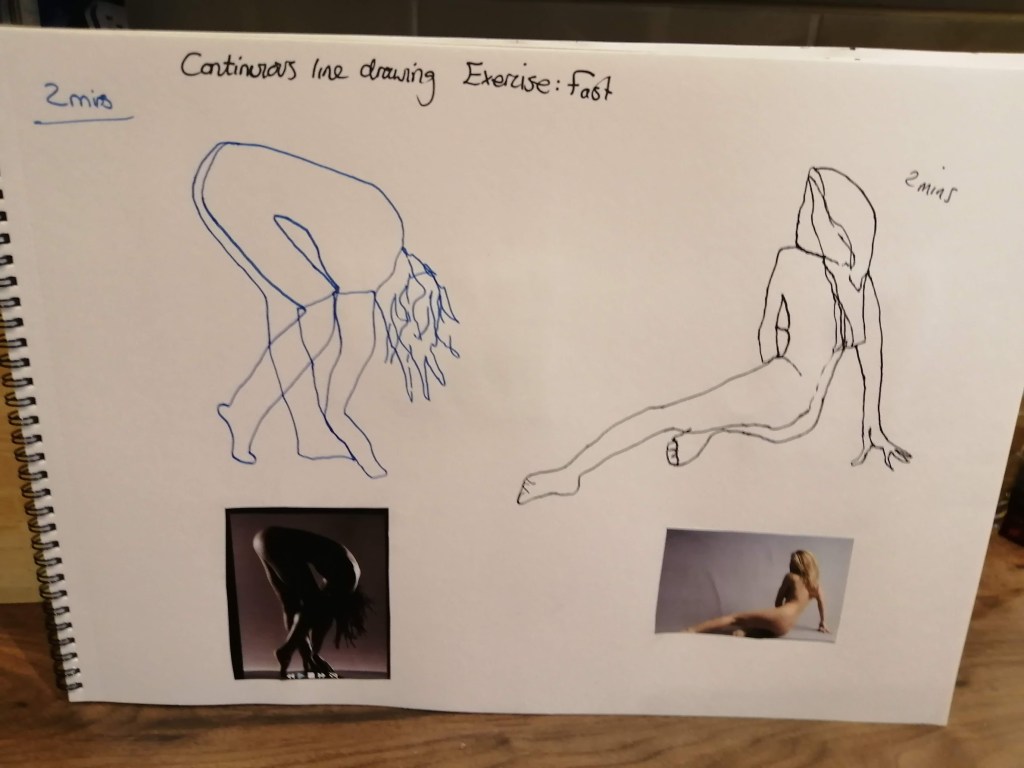
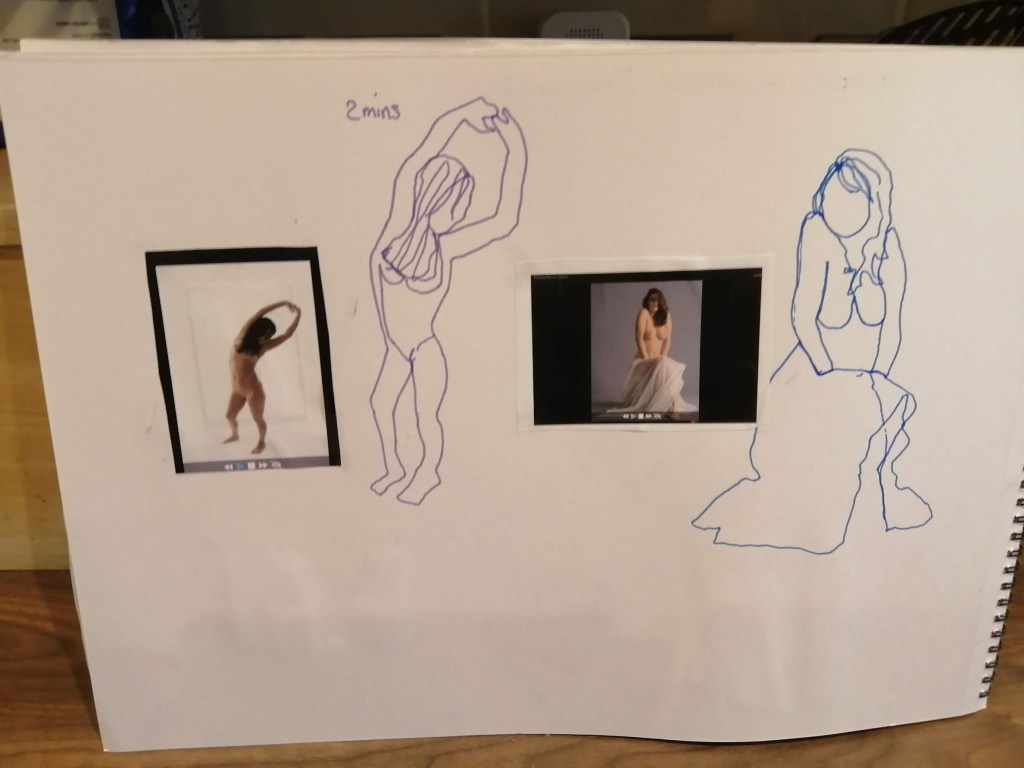
Following my attempts at drawing expressions in lines, I wondered what it would be like to sketch an actual person. Researching online I came to a website that assists artists by providing images of models in different poses. The webpage also allows you to set a timer, so I used the two-minute setting for each of the upcoming line drawings. Here are some of my sketches.
Fig. 18 Life drawing pose 1 (2024)
Fig. 19 Life drawing pose 2 (2024)
The sketches are not exactly true to scale or have captured every detail but I am pleased I have managed to capture the women’s poses.
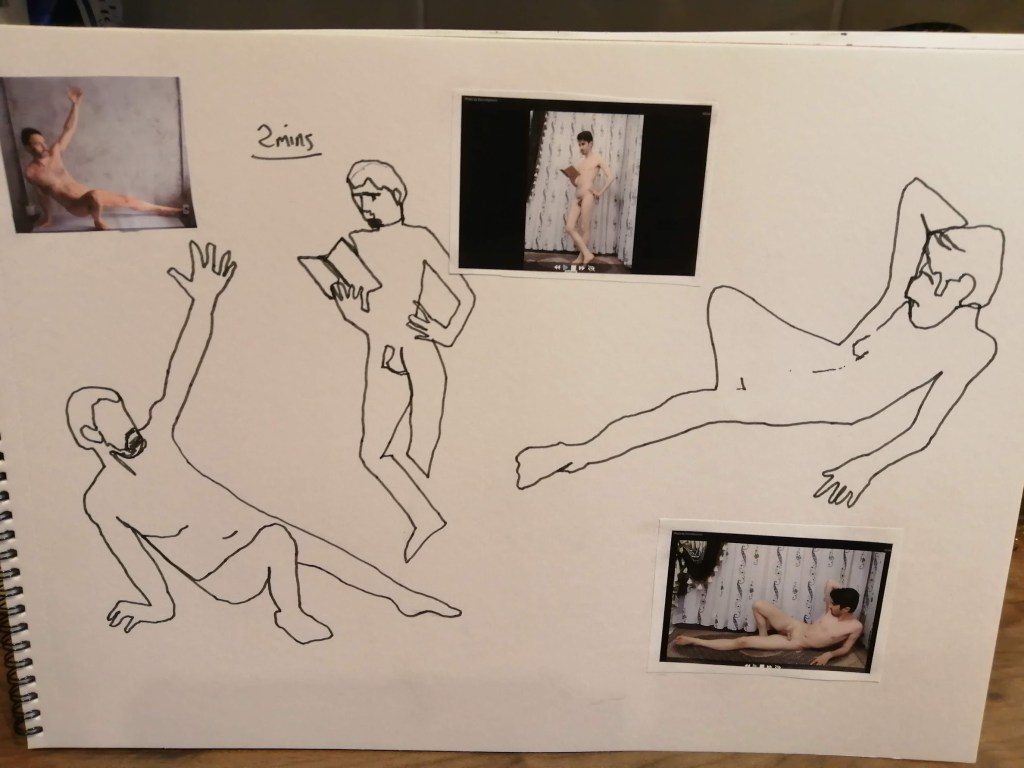
After, I thought would I be able to do the same for a male model? Searching on the website I found three photos of male models to use for reference.
Fig.20 Life drawing pose 3 (2024)
The first sketch I did was the middle one, the second was the one to the right and finally the one to the left was the last sketch I drew. It was interesting to see the line become more fluid the more I practiced and that the last drawing has recorded more information and done so more accurately.
Reflection
This continious line drawing exercise has been an enjoyable one. Having a short time limit has made me not worry about making mistakes but think quickly about what is the best way to convey what is in front of me.
It has been beneficial for strengthening my hand and eye coordination and has made me make deliberate choices in the placement of each mark. This exercise will undoubtedly help improve my drawings if I practice this exercise often.
References
About – DFT – minimalist line art (no date) DFT. Available at: https://www.dft.art/about (Accessed: 01 February 2024).